In a previous article I explained how to install Pi-hole on a Raspberry Pi; this time we will install and configure it inside Docker.
To simplify the process we will use Portainer.io (I explained how to install it in this article), so open your web browser and go to the URL:
http://192.168.1.100:9000/
(be sure to replace 192.168.1.100 with your Raspberry Pi’s IP address).
Once you have logged in with the admin credentials, go to the Containers page (selecting it from the navigation panel on the left) and click the “Add container” button. Now give the container a name (pihole), leave “DockerHub” selected as the registry and type “pihole/pihole:latest” in the image field.
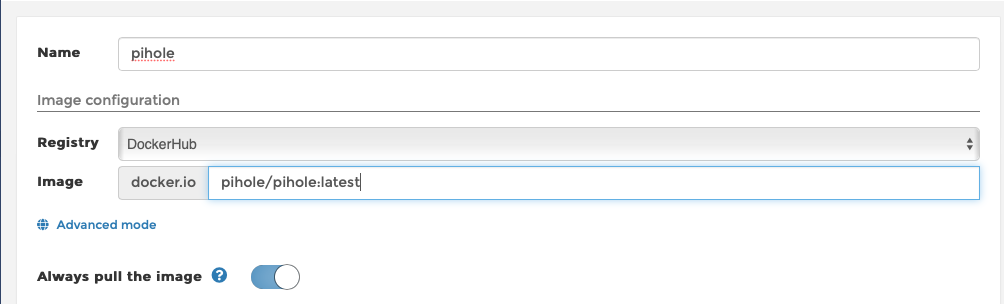
Scroll down to the next section, where we will configure which network ports to expose to the Pi-hole image.
Click the “publish a new network port” button for each port.
Specifically, add the following ports:
- host 80 -> container 80 type TCP
- host 443 -> container 443 type TCP
- host 53 -> container 53 type TCP
- host 53 -> container 53 type UDP
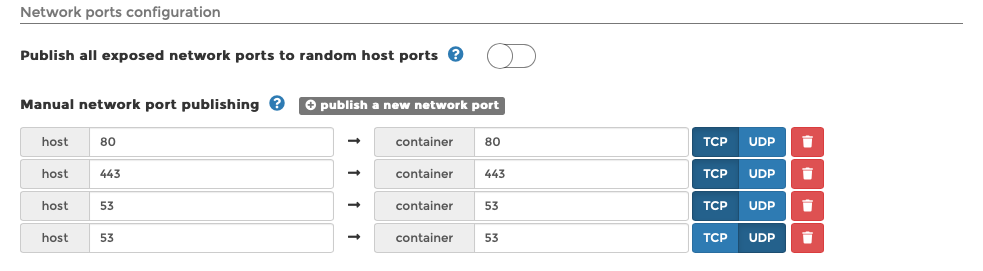
Scroll further down to the “Advanced container settings” section and, just below it, select “Volumes“.
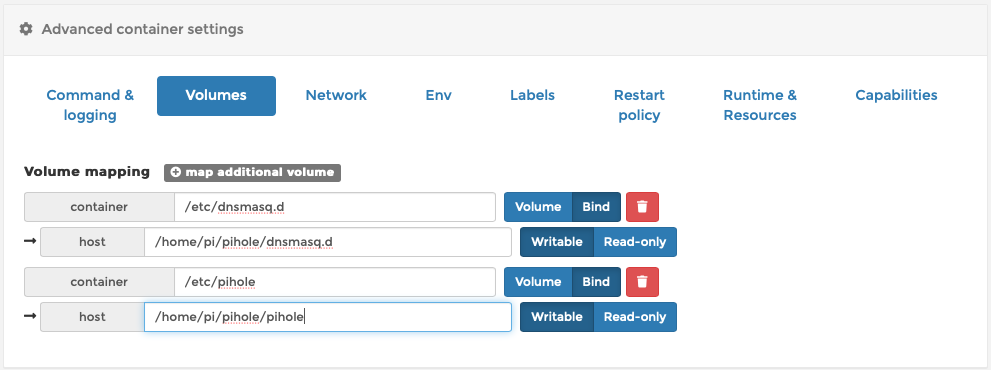
Here we simply need to map some folders in the container to folders on the Raspberry Pi. To add each mapping, click the “map additional volume” button for each folder.
The folders to configure are:
container: /etc/dnsmasq.d type Bind host: /home/pi/pihole/dnsmasq.d Writable
e
container: /etc/pihole type Bind host: /home/pi/pihole/pihole Writable
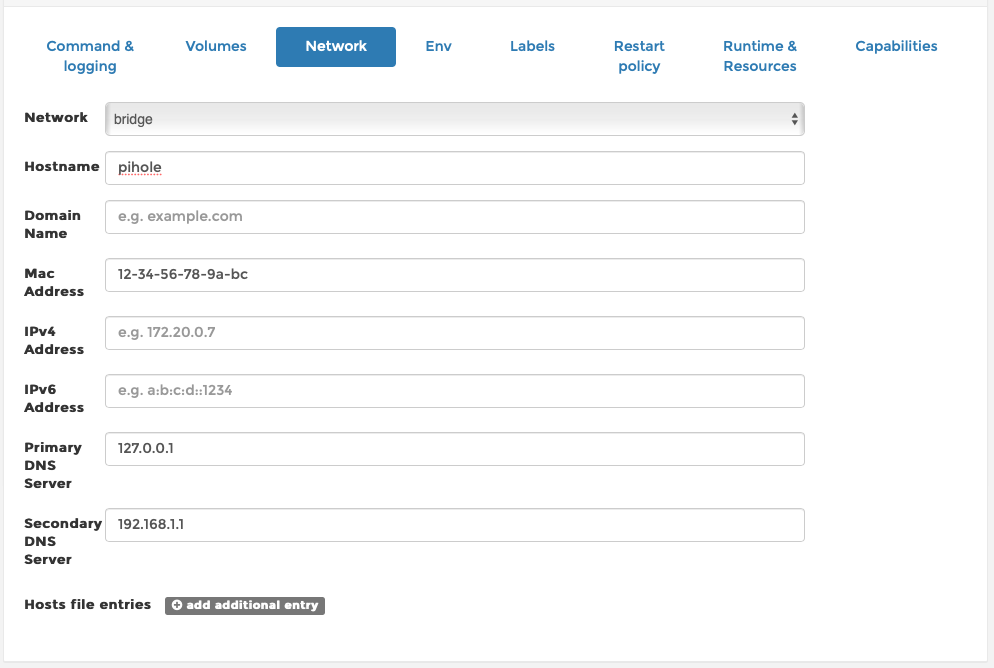
Now select “Network“. Here we simply give the container a network hostname, assign it a MAC address and enter the DNS servers (the primary one will point to itself, by entering 127.0.0.1)
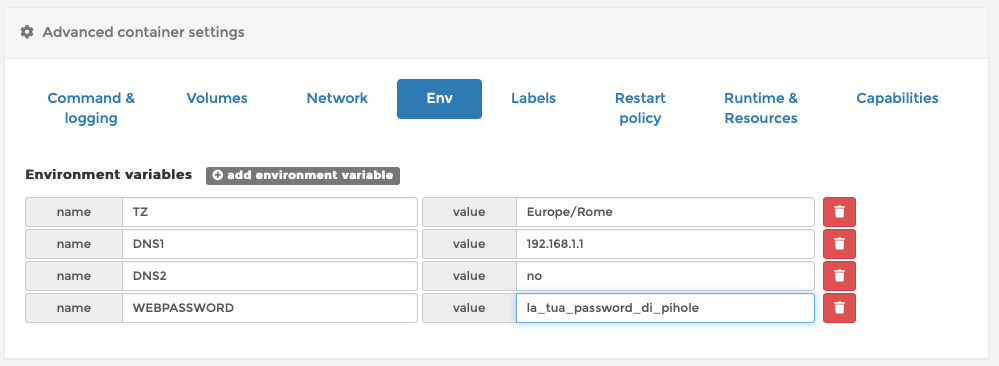
Now move to the “Env” section, where we will set some basic configuration for Pi-hole, such as the time zone, the DNS servers and the password for accessing the Pi-hole web configuration (for each row, click the “add environment variable” button)
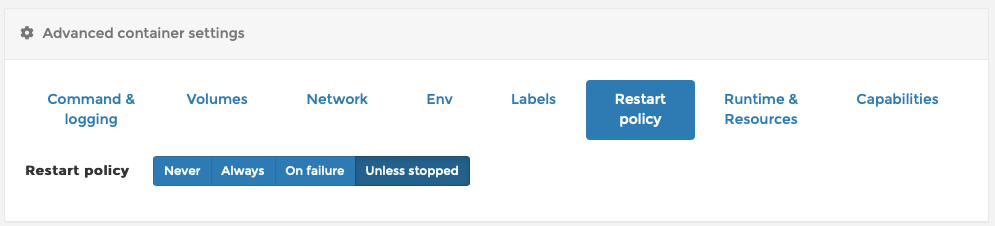
The last thing to set is the restart policy. Click the “Restart policy” tab and then click the “Unless stopped” button. This option means that the Pi-hole container will always restart if it crashes and will also start after the Raspberry Pi boots.
The container will only ever be stopped manually. This is what we want, as it is essential that the DNS server is always running on our network. Once you switch to using the Pi-hole DNS server, if it stops, network devices will no longer know how to resolve DNS requests and your network traffic won’t know where to go.
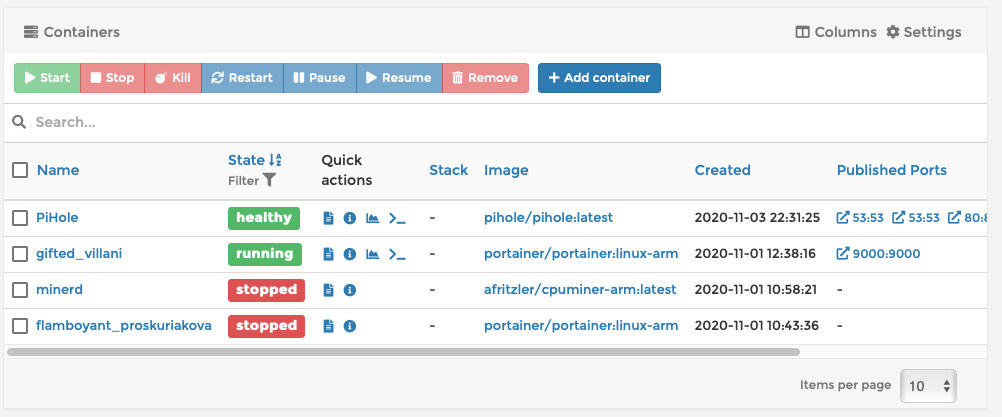
Now click “Deploy container” in the middle of the page. Pi-hole should be up and running shortly! Once it has finished loading, you should see it labelled as “healthy”:
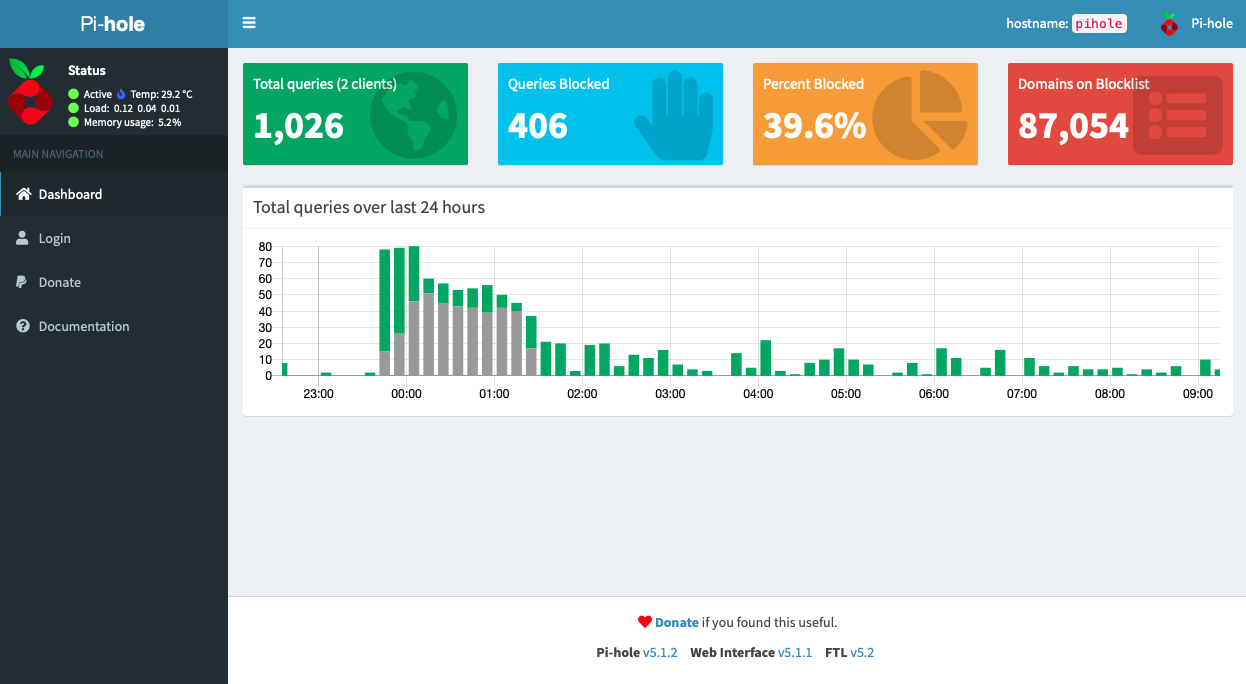
To view the Pi-hole admin page, go to the following URL http://192.168.1.100/admin (again, replace 192.168.1.100 with your Raspberry Pi’s IP). You should see the following page (after logging in with your admin password):
All that’s left to do is configure your router to use the Pi-hole DNS server.
Enjoy!
