In a previous article I explained how to install an OpenVPN server directly on a Raspberry Pi; in this article I will describe how to achieve the same setup inside a Docker container.
Of course, to complete this guide you will need a Raspberry Pi with Docker installed (a guide to installing Docker is available here).
With that said, clone the repository onto the Raspberry Pi with the following git command.
git clone https://github.com/olivierguerriat/rpi-docker-openvpn.git
Now move into the directory you just cloned:
cd rpi-docker-openvpn/
Create a new Docker image from these files. In this example we will call it myownvpn:
docker build -t myownvpn .
Next, we need a volume or directory to store the keys and our .ovpn configuration files. This is a very important step, because our keys will be saved here. I therefore recommend keeping this directory secure, and not sharing it or changing its permissions.
cd ..
mkdir vpn-data && touch vpn-data/vars
Finally, we can start generating the OpenVPN configuration file:
docker run -v $PWD/vpn-data:/etc/openvpn --rm myownvpn ovpn_genconfig -u udp://YOUR_PUBLIC_IP:3000
Be sure to replace “YOUR_PUBLIC_IP” with your IP address or domain name. You can change the port if you wish (it must be the same one that is forwarded from your router to the Raspberry Pi). In this example I used the UDP protocol and port 3000.
Once you have run the command, you should get output similar to this.
Processing PUSH Config: 'block-outside-dns'
Processing Route Config: '192.168.254.0/24'
Processing PUSH Config: 'dhcp-option DNS 8.8.8.8'
Processing PUSH Config: 'dhcp-option DNS 8.8.4.4'
Successfully generated config
Cleaning up before Exit ...
Now we need to initialise our PKI. This will generate our CA certificate, and we will have a private key belonging to the PKI.
You will be asked to set a password to protect the private key.
Below is the command to run, followed by part of the output (I have removed some parts, but it should look similar)
docker run -v $PWD/vpn-data:/etc/openvpn --rm -it myownvpn ovpn_initpki
init-pki complete; you may now create a CA or requests.
Your newly created PKI dir is: /etc/openvpn/pkiGenerating a 2048 bit RSA private key
............................................................................+++
....+++
writing new private key to '/etc/openvpn/pki/private/ca.key.XXXXCFGIEm'
Enter PEM pass phrase:
Verifying - Enter PEM pass phrase:
...
Common Name (eg: your user, host, or server name) [Easy-RSA CA]:FargionConsulting
CA creation complete and you may now import and sign cert requests.
Your new CA certificate file for publishing is at:
/etc/openvpn/pki/ca.crtGenerating DH parameters, 2048 bit long safe prime, generator 2
This is going to take a long time
... # Wait a while
Enter pass phrase for /etc/openvpn/pki/private/ca.key:
Check that the request matches the signature
...
Enter pass phrase for /etc/openvpn/pki/private/ca.key:An updated CRL has been created.
CRL file: /etc/openvpn/pki/crl.pem
Finally, we can start the VPN server with the following command:
docker run -v $PWD/vpn-data:/etc/openvpn -d -p 3000:1194/udp --cap-add=NET_ADMIN myownvpn
So far we have created and configured our OpenVPN server, but we have not yet created any users.
To connect to this OpenVPN server, we need to create a user for each connection.
Here we can create a user with or without a password.
The command to create a user without a password is:
docker run -v $PWD/vpn-data:/etc/openvpn --rm -it myownvpn easyrsa build-client-full user1 nopass
while to create one with a password it is:
docker run -v $PWD/vpn-data:/etc/openvpn --rm -it myownvpn easyrsa build-client-full user1
immediately after confirming the command, you will be asked for the password to assign to the client.
In both cases you will be asked for the CA password. The command output will be similar to the following:
Generating a 2048 bit RSA private key
........................................................+++
..........................................................+++
writing new private key to '/etc/openvpn/pki/private/user1.key.XXXXeoGIJE'
-----
Using configuration from /usr/share/easy-rsa/openssl-1.0.cnf
Enter pass phrase for /etc/openvpn/pki/private/ca.key:
...
In this final step, we generate the configuration file the user will need to connect to the VPN server.
To generate this file, run the following command:
docker run -v $PWD/vpn-data:/etc/openvpn --rm myownvpn ovpn_getclient user1 > user1.ovpn
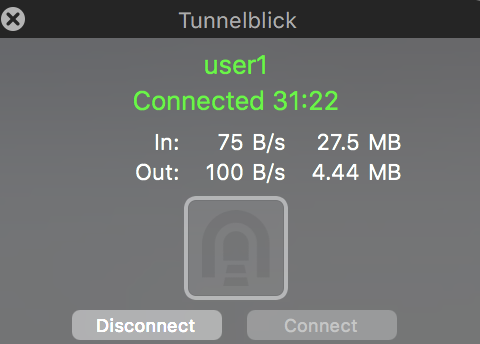
You can copy the user1.ovpn file using an SCP or SFTP client, or any method you like. Users can connect to our server with this file. In my case I am using the Tunnelblick client on macOS.
Here is the result I got:
Enjoy!
Enjoy!
