With every new version of macOS, Apple adds interesting new features, but talking to Mac users every day we have found that many consider things to be new that are actually not new at all, just little known, having been in the operating system for years. Below are ten macOS tricks and little-known features of the operating system.
Add a printer to the Dock
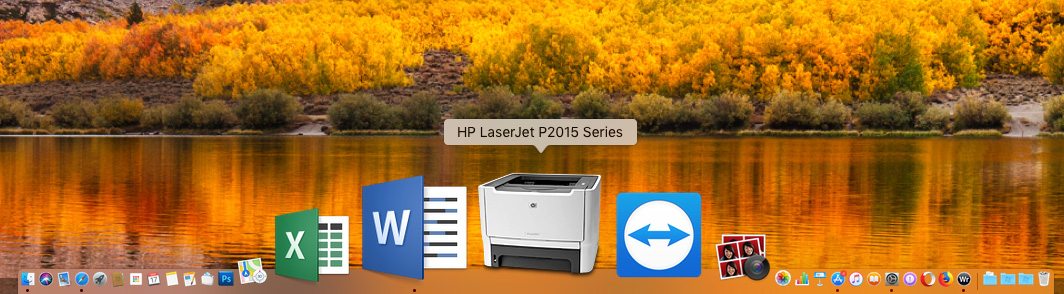
You can print a document without opening it: simply drag it onto the printer icon in the Dock. But how do you get your printer to appear in the Dock?
Just open System Preferences, select “Printers & Scanners” and drag the icon of your preferred printer to the Dock. From then on, you can drag anything you want to print onto this icon. The window that appears when you drag a document onto the icon is the printer queue window, the same one that lets you manage, pause, resume and delete print jobs.
Print to multiple printers
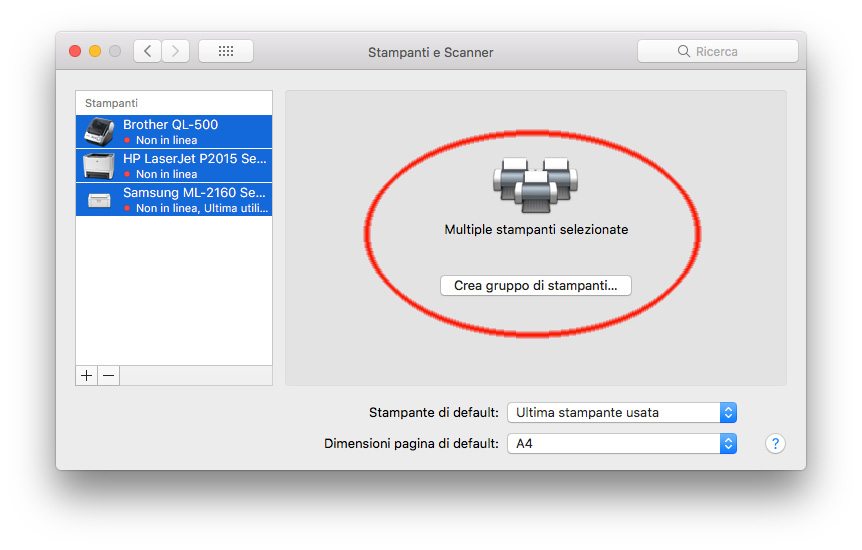
Mac OS X lets you create “printer pools”. You do this by selecting several printers at once (using the Shift key) in the “Printers & Scanners” preferences and then selecting “Create Printer Pool”. The purpose of this feature is simple: if the printers you use are often busy and you want to print a document as quickly as possible, you can create a printer pool. The document will be printed on the first available printer in the pool. To print multiple copies of a document simultaneously on different printers, simply print one copy to the printer pool several times. If you print multiple copies to a printer pool in one go, all the copies will be printed one after another on the same printer.
Create a folder from a selection of files
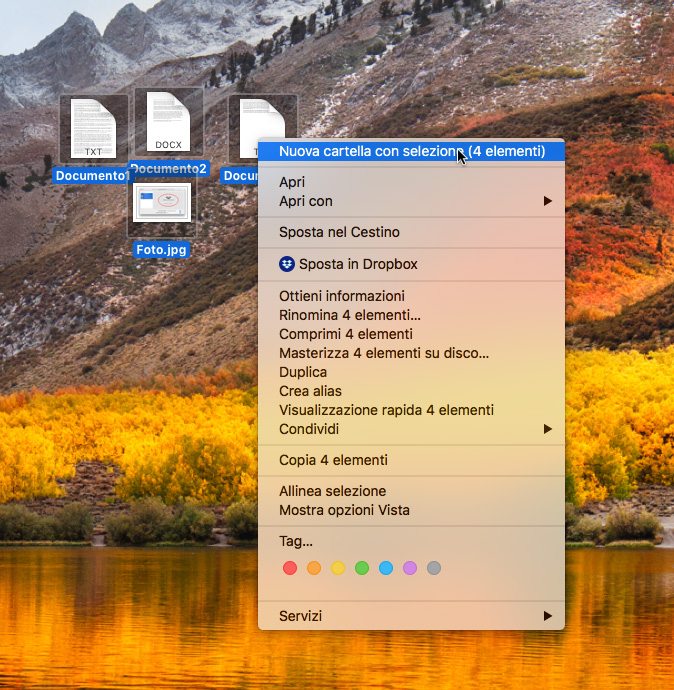
This feature has been available since Mac OS X 10.7 Lion but is little known, and it is useful for quickly creating a folder of items on the desktop or in a Finder window. Simply select all the items you want to group, hold down the Control key while clicking one of the selected items (or right-click where possible), choose “New Folder with Selection”, enter a name for the folder and press Enter.
Duplicate a file by dragging the icon to the left of the title
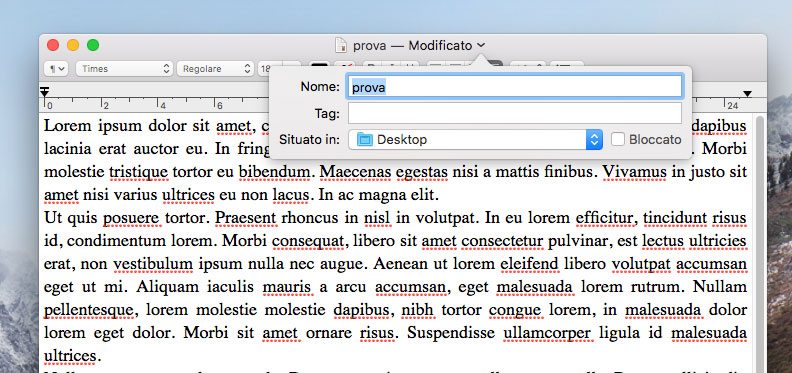
The icon that appears at the top centre, in a document’s title bar, is not just a graphic element. By holding down the Alt key and dragging that icon (you need to click precisely on the icon to the left of the title), you can instantly duplicate any document. In some applications you can also click the file name shown at the top to rename the document. Right-clicking (or the equivalent trackpad gesture) displays the document’s full path.
Navigate the Finder with the keyboard
You can move around the Finder between folders and subfolders using the keyboard. Cmd-Down Arrow opens a file or folder, and Cmd-Up Arrow moves back up to the enclosing folder. Holding down Alt lets you open folders and subfolders and jump from the first to the last file in a folder. You can also use the keyboard in Spotlight searches. Found a folder with a search and want to see what’s inside it? Just select it with the arrow keys and press Enter. The Tab key lets you move to the right in the Spotlight window.
Choose which folder the “New Finder Window” command opens
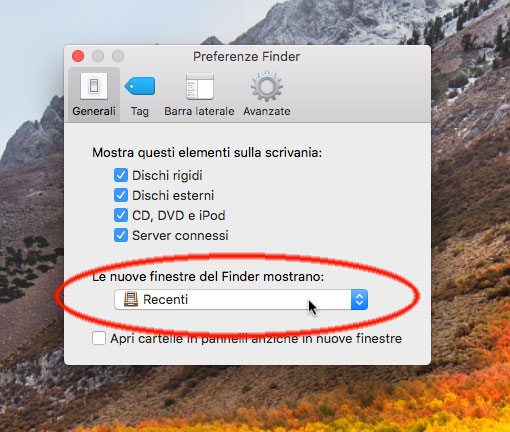
The folder that a new Finder window opens by default, when you choose the corresponding command from the “File” menu or press CMD-N, can be customised by the user. Simply select “Preferences” from the “Finder” menu and, in the General section, choose the new default location the Finder should open.
Create Smart Folders
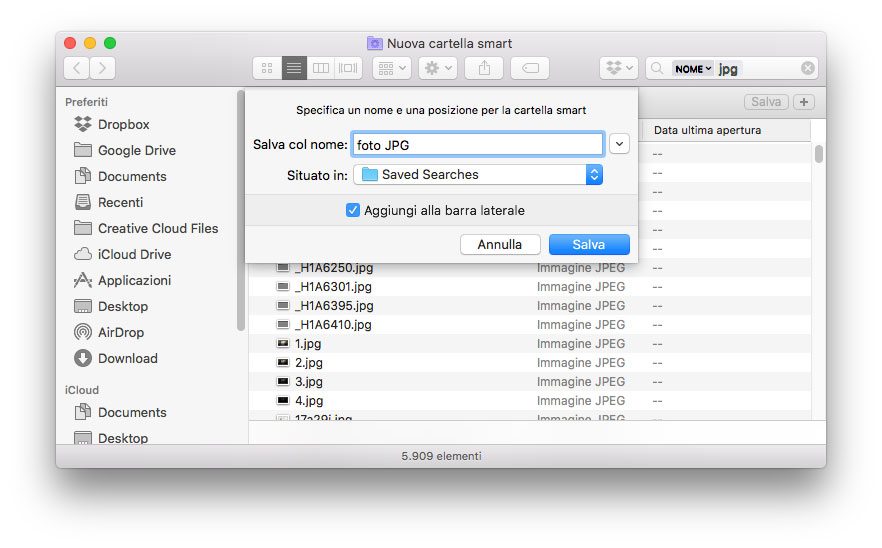
“Smart Folders” automatically gather files by type and subject in the Finder. Smart Folders are updated whenever you modify, add or remove files on your Mac. Creating a Smart Folder is very simple: just select “New Smart Folder” from the Finder’s File menu and enter a topic, phrase or other parameter in the search field. To determine whether the search should include only file names or their entire contents, choose “Name matches” in the search suggestions shown below the search field, click Name, then choose “Filename” or “Everything”.
To search for other specific attributes, click the “Add” button below the search field, then choose the attributes you want using the search attribute pop-up menus. The menus work in combination; for example, to search for images, choose “Kind” from the pop-up menu on the left, then “Image” from the pop-up menu next to it. Clicking “Save” lets you specify the name and location of the Smart Folder. If you don’t want the Smart Folder to appear in the sidebar, simply deselect the “Add To Sidebar” option before saving. To change a Smart Folder’s criteria, open the folder and start typing in its search field, or click the Action pop-up menu and choose “Show Search Criteria”.
Instantly create clippings of text, images and website URLs
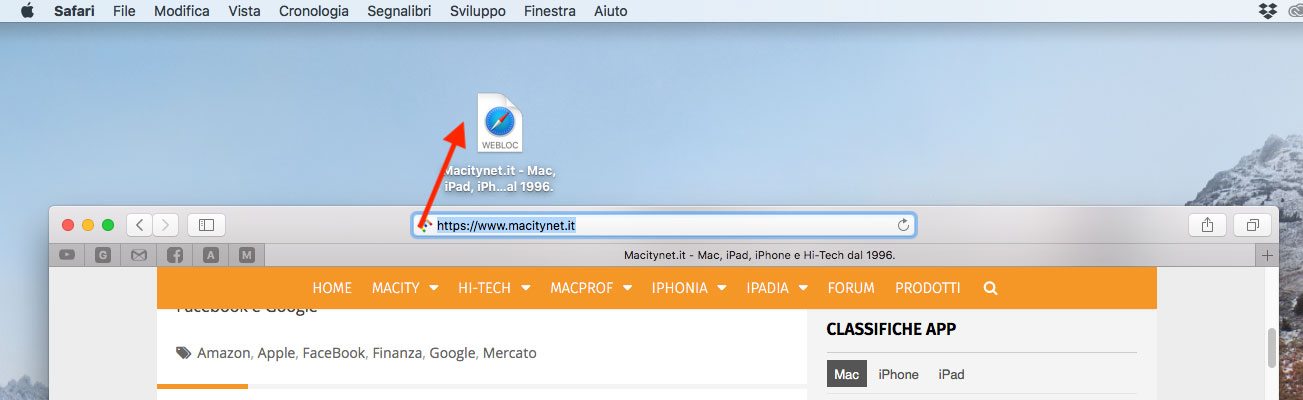
You may come across some interesting text on a web page. It can be useful to save it, and macOS offers a very simple way to do so (although it doesn’t work with some sites): simply select the text you want and literally drag the selected block into a document or onto the desktop, and a document will be created containing the selected text. It hardly needs saying, but the mechanism also works from Safari with images and with website URLs (just drag a site’s favicon onto the desktop or elsewhere to keep the site to hand). Some web pages may prevent you from saving elements that appear on the page.
Sign a PDF with the trackpad or camera
If you have any Mac laptop with a trackpad, you may not know a little “trick”: you can sign any PDF. Open the PDF you want to sign in the Preview app, click the toolbox icon in the toolbar to show the “Markup Toolbar” (to the left of the search field), then click the “Sign” icon. A window appears that lets you use the trackpad to create a new signature: simply sign your name on the trackpad with your finger and, when you have finished, press any key.
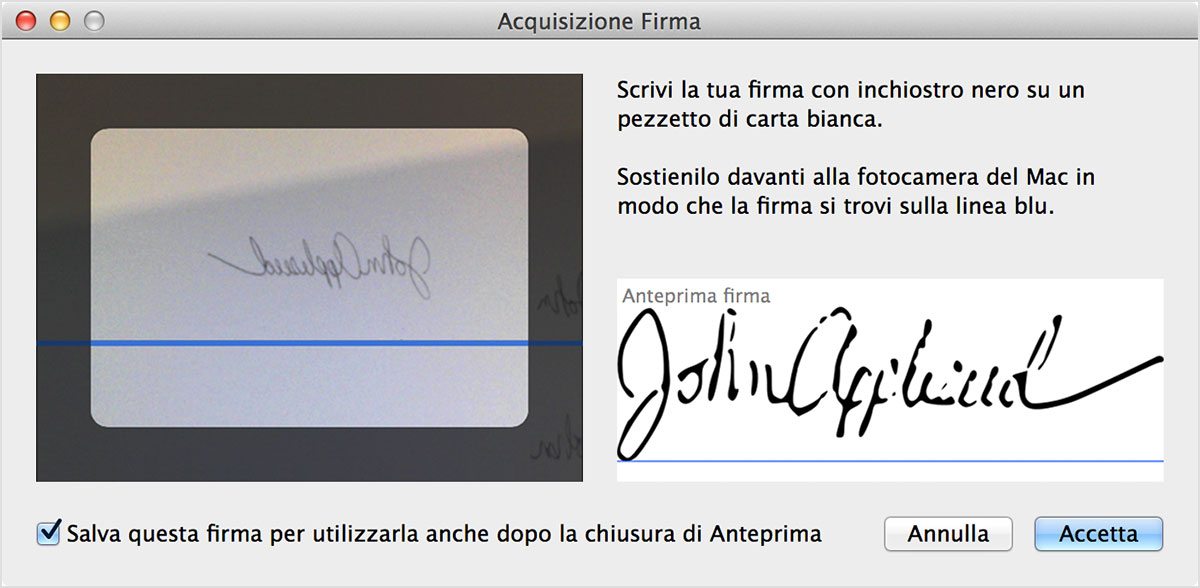
Alternatively, you can sign a sheet of paper and use the built-in camera to capture the signature. Just hold your signature on a white sheet of paper in front of the camera so that it lines up with the blue line in the window. When the signature appears in the window, click “Done”. To use the signature, simply drag it to the desired position, using the handles to adjust its size. If you use iCloud Drive, your signatures are available on all your Macs with iCloud enabled.
Type accented characters
Many people don’t know that to type an accented character or an alternative version of a character, you simply hold down the key until the alternative characters appear. This is a very handy way to get variants of a character instantly, or if, for example, your Mac has an English keyboard.
To choose one of the characters displayed, press the corresponding number shown below the character or click the character you want to use. If you decide not to type an accented character after holding down a key, simply type another character or press the Esc key.
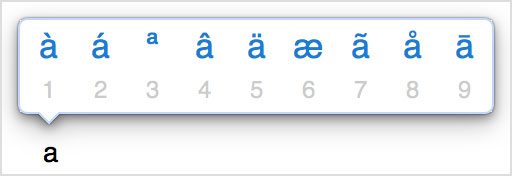
If there are no additional characters available for the key you are holding down, the pop-up menu is not displayed. The menu is also not displayed when the “Key Repeat” slider is set to Off in the Keyboard pane of System Preferences.
Enjoy!
