In this article we will install and configure Pi-hole, a DNS (Domain Name System) server that, as well as performing that role, blocks and removes advertising from the sites we visit (an ad blocker).
Pi-hole describes itself as “A black hole for Internet advertisements”, a concept that certainly captures the essence of the project but which, in my opinion, is a little narrow compared with what a product like this can really do for the end user.
According to a more technical definition available on the Arch Linux Wiki, Pi-hole is a:
DNS sinkhole that compiles a blocklist of domains known to serve ads and malware from multiple third-party sources. Pi-hole, through the use of dnsmasq, simply drops all requests for domains on its blocklist. This setup effectively implements network-wide ad blocking without having to configure each individual client. The package offers both a web interface and a command-line interface.
If you are used to Adblock Plus or any similar product in your favourite browser, you will already understand the underlying concept: preventing resources from being loaded at source, in one go and for every device connected to the network, because Pi-hole intercepts and handles them differently from public DNS servers, cutting off communication with the domains used to deliver intrusive advertising (and more). The product’s great advantage lies in centralising all of this, and in taking some of the load off the browser, which can then do without an add-on that is often resource-hungry (depending on which one you use).
Installation
All clear? Good. Now let’s get to the heart of the article: installing Pi-hole on a Raspberry Pi (certainly the most convenient option), on a NAS provided it can run Docker, or on a Linux machine you already use for other tasks on your network. You can find the product’s compatibility list at docs.pi-hole.net/main/prerequesites/#supported-operating-systems.
I based this article on the Raspberry Pi, and created a Raspbian virtual machine on my Mac specifically to capture some screenshots for it. Let’s get started.
Connect to your Raspberry Pi via SSH and run the installation commandcurl -sSL https://install.pi-hole.net | bash
exactly as shown on the Pi-hole website’s home page. After a quick system check (just to see whether your Raspberry Pi already has everything it needs or whether something needs to be installed), you will be presented with the Pi-hole configuration screens:

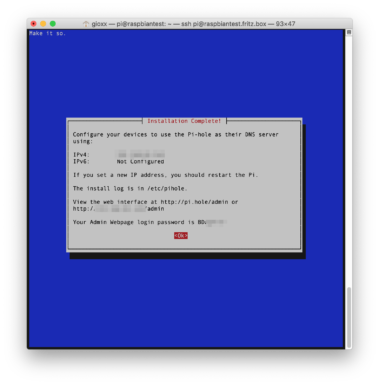
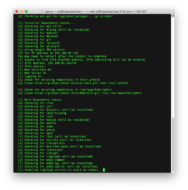

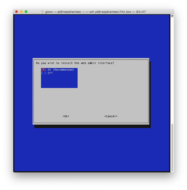
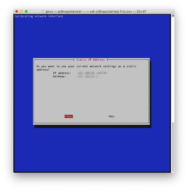
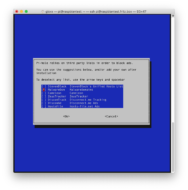
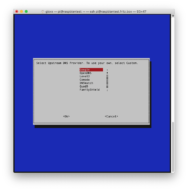
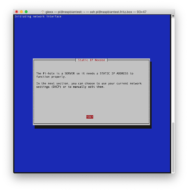
Below is the list of steps I followed, including some steps not shown in the gallery:
- Installation begins. Press Enter to continue.
- You will reach the information screen about the IP address to assign to your Pi-hole installation: make sure it always stays the same (static, or via a reservation on the DHCP server).
- Tell Pi-hole which public DNS servers you want to use for domain name resolution (in my case I chose Google’s, 8.8.8.8 and 8.8.4.4).
- Now specify which blocklists you want to start using. The space bar selects or deselects an item; use the arrow keys to move around the screen. When you have finished, press Enter to confirm. Don’t worry about this choice: you can change it later.
- Select both communication protocols (IPv4 and IPv6).
- Confirm the IP address of the machine (Raspberry Pi) and of your router when prompted.
- When prompted, confirm that you want to install the web admin interface. A further confirmation will be needed after the prompt to install lighttpd. Allow queries to be logged (0 – Show everything).
- Now just wait for the installation to finish. Finally, you will be shown a summary page containing, among other things, the admin password for your Pi-hole.
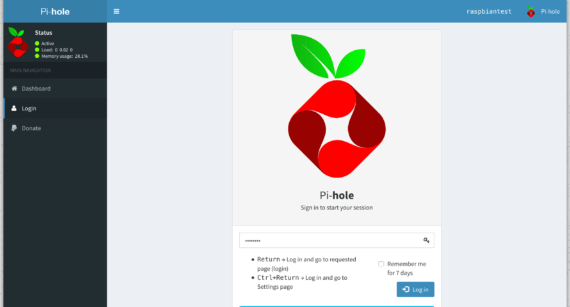
Now you can connect to the Pi-hole console using the address shown on the summary screen, for example http://192.168.1.10/admin. Barring any surprises, you will see the Pi-hole admin console: click Login (in the left-hand column) and enter the password you were given earlier. Only then will you have full access to Pi-hole’s management features.
Usage
Here we are: you have managed to install Pi-hole on your Raspberry Pi. All that’s left is to use it and roll it out to all the clients on your network, but first I think some tuning and customisation is needed.
What do you need to know? Well, if I were you I would certainly take a look at Settings, where you will find information about the installation (with the option to run some quick commands, such as restarting or shutting down the system, or stopping logging), the subscribed blacklists and the public DNS servers used for domain name resolution. Pi-hole can also act as a DHCP server if you prefer, replacing one of the functions a router performs by default. Although that works perfectly well, I prefer to let my Fritz!Box continue to handle this task and have it pass DNS requests through my Raspberry Pi (so that they are subject to Pi-hole’s control).
Finally, you will find a screen dedicated to customising the console and to the API you can use to integrate other software with Pi-hole, as well as the Privacy section (for the level/depth of logging to use) and Teleporter, the Pi-hole module that lets you export your configuration and import it into a different installation (which is more or less what you do when backing up and restoring any of your data).
What did I change?
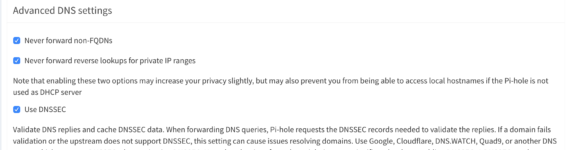
Leaving aside the blacklists, which I’ll come to shortly, I certainly tweaked the DNS settings, forcing Pi-hole to query Google using DNSSEC:
I then tweaked the console settings, asking it not to show me certain domains that are blocked in every case (addresses used for intrusive advertising in Android apps — those banners that often lead to subscriptions you never asked for), but this is certainly something you will also find useful once you start building up a browsing history through Pi-hole.
Blocklists
That’s what Pi-hole calls them (Settings → Blocklists). These are blacklists of domains you can almost certainly do without: generally those that serve intrusive advertising banners, but also dangerous scripts that could harm your browser (Malware Domains). After clearing out some of the lists I initially used and studied, I have arrived at a setup I am very happy with, which I “fine-tune” to some extent using Pi-hole’s Whitelist.
I currently use these lists:
| List URL | Purpose |
|---|---|
| https://raw.githubusercontent.com/lightswitch05/hosts/master/ads-and-tracking.txt | A comprehensive list that blocks domains tracking day-to-day browsing activity, also covering apps that load banners on Android and iOS. Ads are one thing (we can put up with them), but content that leads to unwanted subscriptions you never knowingly requested is quite another. |
| https://www.squidblacklist.org/downloads/dg-ads.acl | Same purpose as the list above; this one is constantly updated by squidblacklist.org (don’t know Squid? Take a look here). |
| https://raw.githubusercontent.com/StevenBlack/hosts/master/hosts | Steven Black combines several blocklists (Adware, Malware, Fraud, Scam, Spam, Tracking and Cryptomining), trying to eliminate all false positives and keeping his work constantly up to date. If you take a look at his GitHub space, you will find lists for filtering other types of websites too. |
| https://raw.githubusercontent.com/hoshsadiq/adblock-nocoin-list/master/hosts.txt | Along the same lines as what I already do with NoCoin for Adblock Plus, this list is ready-made (and constantly updated) for Pi-hole to use. It blocks all websites that use mining scripts that strain your PC’s resources. |
| https://mirror1.malwaredomains.com/files/justdomains | As with the NoCoin list I mentioned just above, the Harmful WebSites list also comes in a hosts-file version that can be fed to Pi-hole. It blocks domains that distribute malware. Maintained by malwaredomains.com. |
| https://www.squidblacklist.org/downloads/dg-malicious.acl | Blocks domains that distribute malware. Maintained by squidblacklist.org. |
| http://theantisocialengineer.com/AntiSocial_Blacklist_Community_V1.txt | Blocks all domains that try to defraud visitors by making them believe they are on real, official, well-known sites, such as those of banks, Microsoft, Google, etc. |
| https://phishing.army/download/phishing_army_blocklist_extended.txt | A creation by Andrea ‘Drego‘ Draghetti, launched relatively recently. You can find the official website at phishing.army; the list is updated frequently and always checked to avoid errors and false positives as far as possible. It protects you from websites that try to defraud you while browsing. I personally recommend the extended version, which also includes subdomains. |
(If you want to copy and paste all the URLs easily, see this page: github.com/gioxx/ph-whitelist/blob/master/domains/blocklists.md).
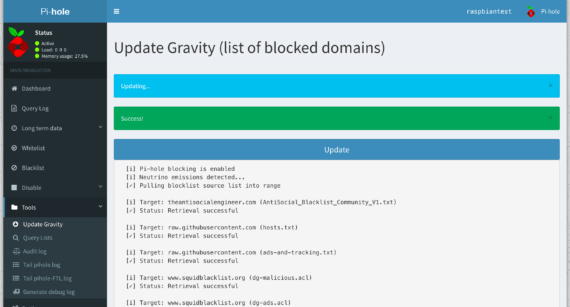
This creates a protective barrier, more against potentially dangerous websites than against advertising as such.
Default lists and other projects
If you want to check or retrieve the lists offered by default during Pi-hole installation, you can find an official reference on GitHub here: github.com/pi-hole/pi-hole/wiki/Customising-sources-for-ad-lists.
You will notice that, beyond these, there is a countless number of projects online aiming to add to the already vast database of domains best avoided. Personally, I always try to review lists and their maintainers to work out which of them can be trusted to keep my Pi-hole rules up to date, so as to avoid unpleasant surprises when browsing from the clients at home and from always-on, always-connected devices. In this regard, there is a very large project I looked at but have abandoned for now because of poorly checked lists: blocklist.site/app, a real showcase offering lists for every need. Perhaps you know of others you would like to share (I’d be glad to hear about them) — the comments section is at your disposal.
Daily updates
Some of the lists I suggested in the table above are updated daily. For this reason, I decided to change Pi-hole’s behaviour and have it perform a full update of all subscriptions every day. By default, the software does this once a week (see: discourse.pi-hole.net/t/updating-blocklist-every-day/16853).
You can check this yourself from the terminal by typing: more /etc/cron.d/pihole.
A line similar to this should tell you when the Gravity module update runs:
7 3 * * 7 root PATH="$PATH:/usr/local/bin/" pihole updateGravity >/var/log/pihole_updateGravity.log || cat /var/log/pihole_updateGravity.log
If you don’t know how to read the first part of the string, don’t worry: it is a sequence indicating minute-hour-day of month-month-day of week, readable by crontab. Want to understand it better? Here you go: crontab.guru/#7_3_*_*_7. To run a daily update, I edited the file with the command:sudo nano /etc/cron.d/pihole,
commenting out the line shown above (just add the hash symbol # at the start of the line) and adding the following immediately below it:
7 3 * * 0-6 root PATH="$PATH:/usr/local/bin/" pihole updateGravity >/var/log/pihole_updateGravity.log || cat /var/log/pihole_updateGravity.log
Notice anything different? Exactly. The last part tells crontab to run the job from day 0 to day 6, i.e. from Sunday to Saturday (crontab.guru/#7_3_*_*_0-6).
Save the change with the CTRL + X key combination, followed by Y to answer yes when nano asks whether to write the changes to the file.
Enjoy!
