In several previous articles I described how to install and configure a Pi-hole server and how to install and configure an OpenVPN server on a Raspberry Pi.
Today I will explain how to take advantage of Pi-hole’s services from any client connected to your VPN.
This setup will keep you protected by your favourite ad blocker not only when you are connected to your home network, but also when you are on the move (as long as you have first established the VPN connection to home).
In addition, using an encrypted VPN connection means that everything you do on the internet is encrypted for as long as you are connected to your VPN.
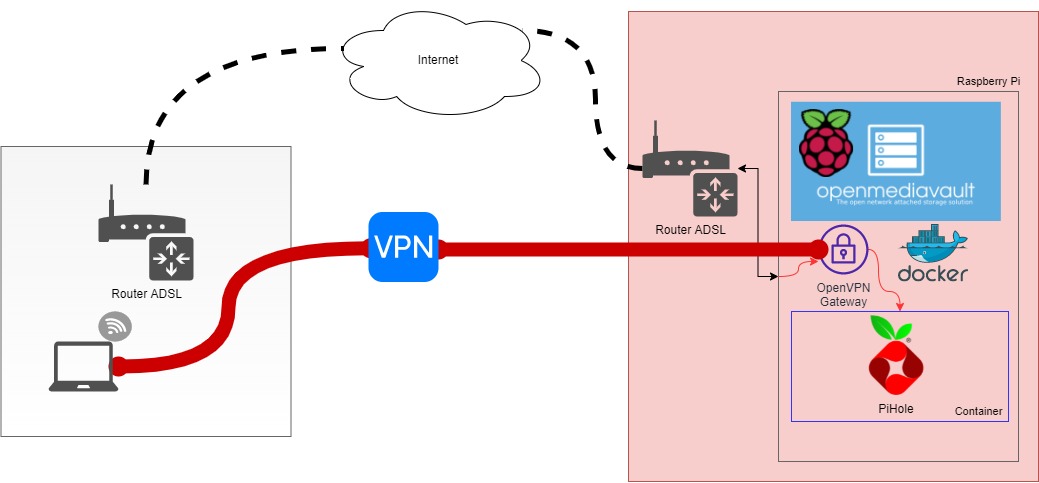
To start, edit the server.conf file. I installed OpenVPN via OpenMediaVault, so this file is located in /etc/openvpn/, and I will use the following command to edit it in the nano text editor:
sudo nano /etc/openvpn/server.conf
Now add the following line
push "dhcp-option DNS 192.168.1.99"
where, of course, you need to replace 192.168.1.99 with the IP address of your Pi-hole server (in my case I entered my Raspberry Pi’s IP, as Pi-hole is installed as a Docker container on the same machine).
Once you have pasted and edited the text, close the file by pressing CTRL+X, then type Y (or S, depending on your system language) and finally press ENTER to confirm.
Once this is done, restart the OpenVPN service with the following command:
sudo /etc/init.d/openvpn restart
Now all that’s left is to test whether the ad blocker works on a device connected to your network via VPN (for example, use your smartphone without connecting it to your Wi-Fi network, connect it (over 3G/4G/5G) to your OpenVPN server, and then try opening a site you know contains ads (for example https://canyoublockit.com/).
Enjoy!
