Linkding is a simple bookmark service that you can self-host (on your own server). It is designed to be minimal, fast and easy to set up using Docker.
The name comes from:
- link, which in everyday language is often used as a synonym for URL and/or bookmark.
- Ding, which is German for “thing”
- …so basically, a thing for managing links
Feature overview:
- Tags for organising bookmarks
- Search by text or tags
- Bulk editing
- Bookmark archive
- Dark mode
- Automatically creates snapshots of bookmarked websites on the Internet Archive Wayback Machine
- Automatically provides titles and descriptions of bookmarked websites
- Import and export of bookmarks in Netscape HTML format
- Extensions for Firefox and Chrome, as well as a bookmarklet that should work in most browsers
- REST API for developing third-party applications
- Admin panel for user self-service and raw data access
- Easy to set up using Docker; uses SQLite as its database
You can find more information about it here (the developer’s GitHub page).
With that said, to install Linkding as a Docker container on your Raspberry Pi you will of course need:
- A Raspberry Pi (Pi Zero or later);
- Docker and docker-compose installed (here is a guide to installing it on a Raspberry Pi);
- A DDNS hostname or a public IP address (for remote access and for configuring the web browser plugin);
With that said, create a folder that will contain the docker-compose.yml file needed to create and configure the container.
mkdir linkdingcd linkdingnano docker-compose.yml
and enter the following:
version: '3'
services:
  linkding:
    container_name: "${LD_CONTAINER_NAME:-linkding}"
    image: sissbruecker/linkding:latest
    ports:
      - "${LD_HOST_PORT:-9090}:9090"
    volumes:
      - "${LD_HOST_DATA_DIR:-./data}:/etc/linkding/data"
    env_file:
      - .env
    restart: unless-stopped
Once you have pasted the text, close the file by pressing CTRL+X, then type Y (or S, depending on your system language) and finally press ENTER to confirm.
Next, create a file called Dockerfile containing the preliminary commands for creating the container (they will only run the first time), by running the following command:
nano Dockerfile
and enter the following:
FROM node:current-alpine AS node-build
WORKDIR /etc/linkding
# install build dependencies
COPY package.json package-lock.json ./
RUN npm install -g npm && \
    npm install
# compile JS components
COPY . .
RUN npm run build

FROM python:3.9.6-slim-buster AS python-base
RUN apt-get update && apt-get -y install build-essential
WORKDIR /etc/linkding

FROM python-base AS python-build
# install build dependencies
COPY requirements.txt requirements.txt
RUN pip install -U pip && pip install -Ur requirements.txt
# run Django part of the build
COPY --from=node-build /etc/linkding .
RUN python manage.py compilescss && \
    python manage.py collectstatic --ignore=*.scss && \
    python manage.py compilescss --delete-files


FROM python-base AS prod-deps
COPY requirements.prod.txt ./requirements.txt
RUN mkdir /opt/venv && \
    python -m venv --upgrade-deps --copies /opt/venv && \
    /opt/venv/bin/pip install --upgrade pip wheel && \
    /opt/venv/bin/pip install -Ur requirements.txt

FROM python:3.9.6-slim-buster as final
RUN apt-get update && apt-get -y install mime-support
WORKDIR /etc/linkding
# copy prod dependencies
COPY --from=prod-deps /opt/venv /opt/venv
# copy output from build stage
COPY --from=python-build /etc/linkding/static static/
# copy application cod

COPY . .
# Expose uwsgi server at port 9090
EXPOSE 9090
# Activate virtual env
ENV VIRTUAL_ENV /opt/venv
ENV PATH /opt/venv/bin:$PATH
# Allow running containers as an an arbitrary user in the root group, to support deployment scenarios like OpenShift, Podman
RUN ["chmod", "g+w", "."]
# Run bootstrap logic
RUN ["chmod", "+x", "./bootstrap.sh"]
CMD ["./bootstrap.sh"]
Again, once you have pasted the text, close the file by pressing CTRL+X, then type Y (or S, depending on your system language) and finally press ENTER to confirm.
Now create a hidden file containing the values for the variables declared in the docker-compose.yml file, by running the following command:
nano .env
and again enter the following:
# Docker container name
LD_CONTAINER_NAME=linkding
# Port on the host system that the application should be published on
LD_HOST_PORT=9090
# Directory on the host system that should be mounted as data dir into the Docker container
LD_HOST_DATA_DIR=./data

# Option to disable background tasks
LD_DISABLE_BACKGROUND_TASKS=False
# Option to disable URL validation for bookmarks completely
LD_DISABLE_URL_VALIDATION=False
Here you can change the port on which the Linkding web page will be published, for example by changing the entry:
...
LD_HOST_PORT=9090
...
to, for example:
...
LD_HOST_PORT=9099
...
Another parameter you can change as you wish is the path where Linkding’s data (database and configuration) is stored. The original code contains the following value:
...
LD_HOST_DATA_DIR=./data
...
where ./data is a folder (created automatically) inside the linkding folder (created at the start of the tutorial); alternatively, you can place it wherever you like by specifying the full path (for example /home/pi/Documents/Linkding-data).
Once you have pasted the text and adapted it to your needs, close the file by pressing CTRL+X, then type Y (or S, depending on your system language) and finally press ENTER to confirm.
Now all that’s left is to bring up the container with the following command:
docker-compose up -d
User setup
For security reasons, the Linkding Docker image does not provide an initial user, so you need to create one after starting the installation. To do so, replace the credentials (highlighted in red) in the following command and run it:
docker-compose exec linkding python manage.py createsuperuser --username=joe --email=joe@example.com
The command will prompt you for a secure password. Once it has completed, you can start using the application by logging in to the user interface with your credentials.
wait a few seconds, then open your preferred web browser and type the following in the address bar:
http://[IP-DEL-TUO-RASPBERRY]:9090
and you will be greeted by the following screen
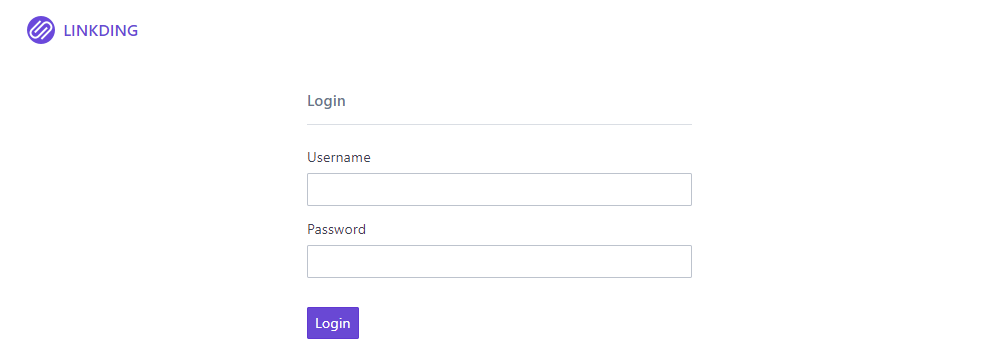
The login credentials will be those set with the user creation command.
To make this service accessible from outside your network, you need to forward, for example, external TCP port 80 to your Raspberry Pi’s (LAN) IP on TCP port 9090. In addition, if your ISP (Internet Service Provider) gives you a dynamic IP, you will need to have configured DDNS (Dynamic DNS… here is a guide to enabling and configuring it with DuckDNS), or have a static IP address with a registered domain name.
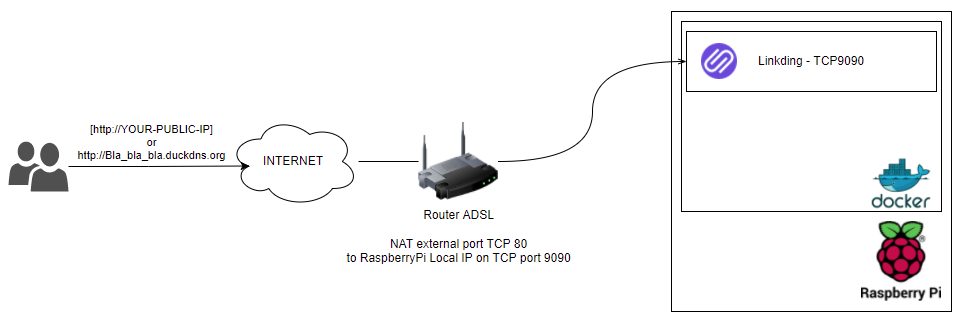
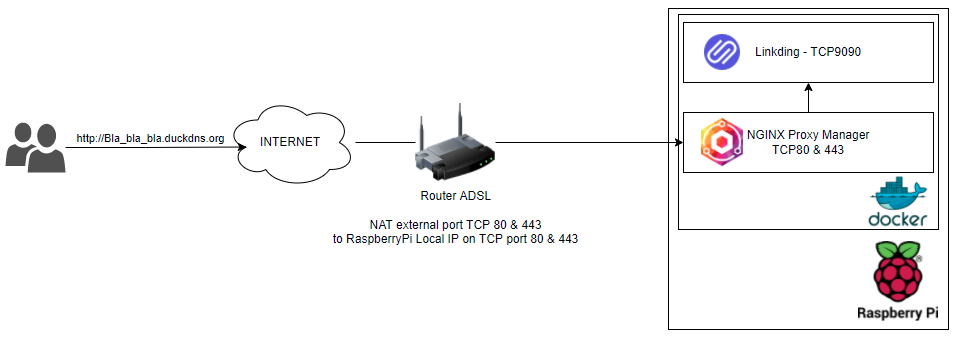
Of course, this way traffic from outside to your Raspberry Pi will not be encrypted (because there is no SSL). To enable an SSL-encrypted connection, I recommend installing and configuring NGINX Proxy Manager (here is a guide to installing it as a Docker container)
Whether or not you use NGINX Proxy Manager, to complete the Linkding configuration, open the web user interface and log in with your credentials. Once logged in, you will see a screen similar to the following:
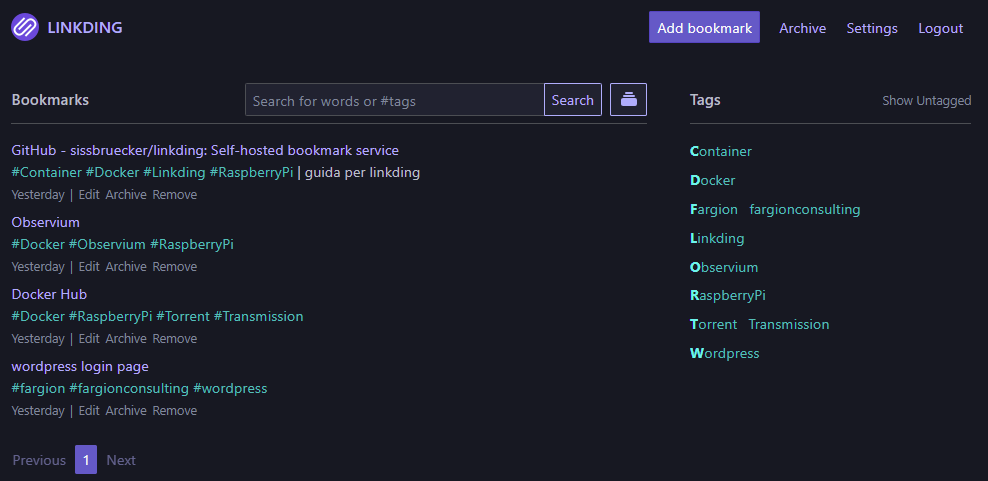
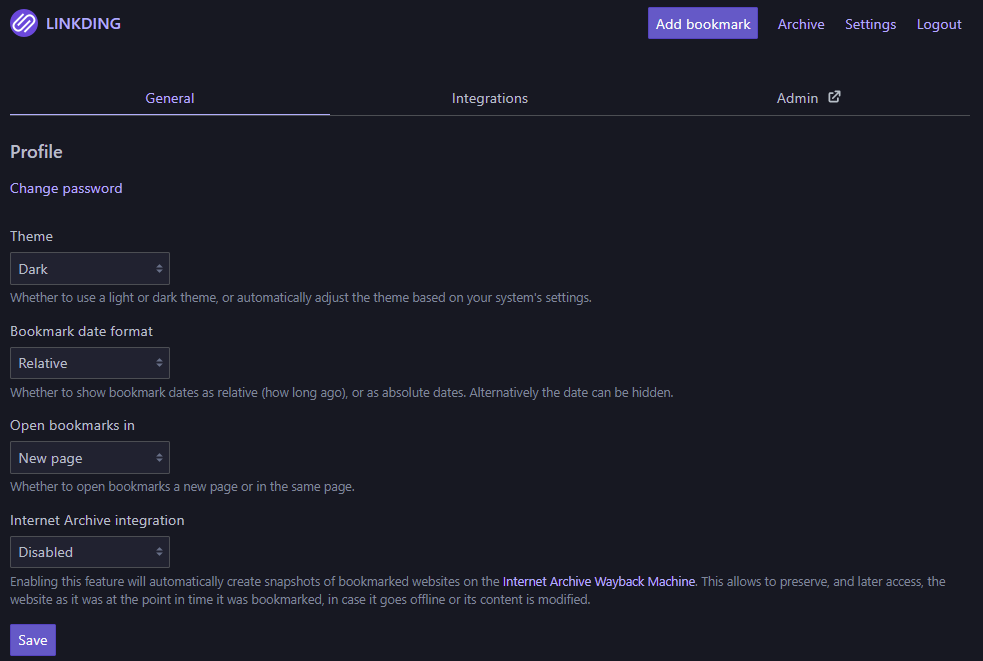
Click “Settings” at the top right
Then click “Integrations” at the top centre
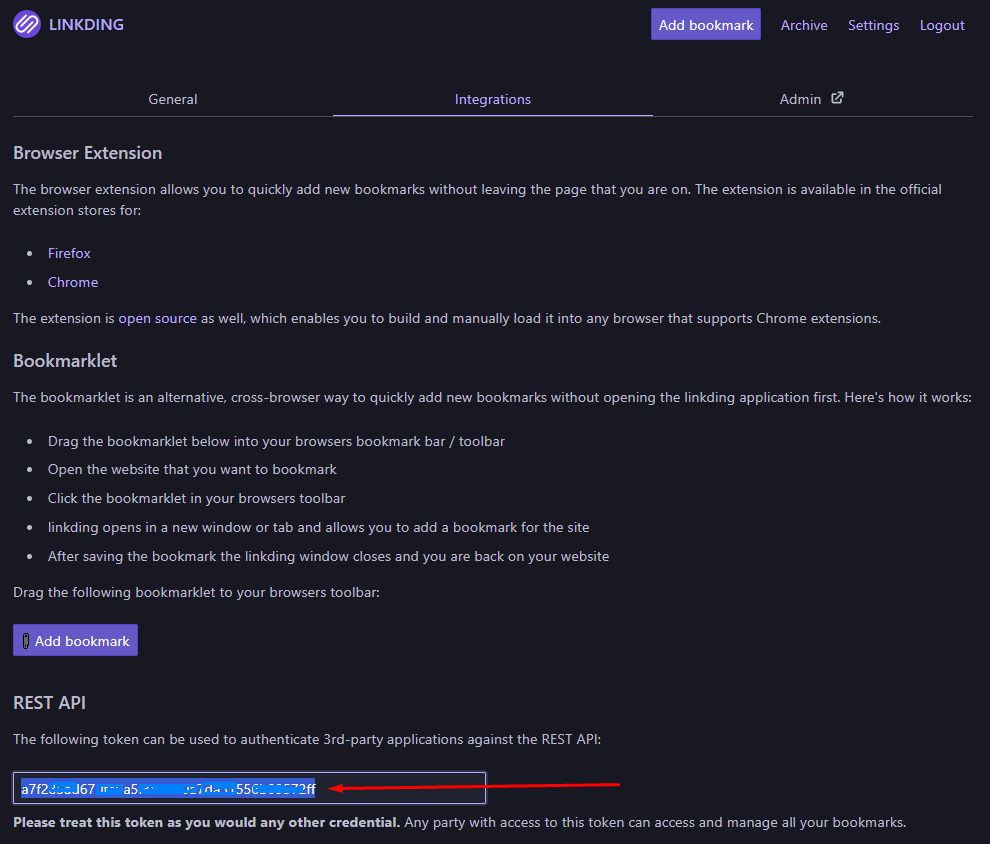
On the screen that appears, simply copy the REST API token at the bottom of the page.
You will need this token, together with the URL where your Linkding instance is published, to configure the browser extension (for Google Chrome or Mozilla Firefox).
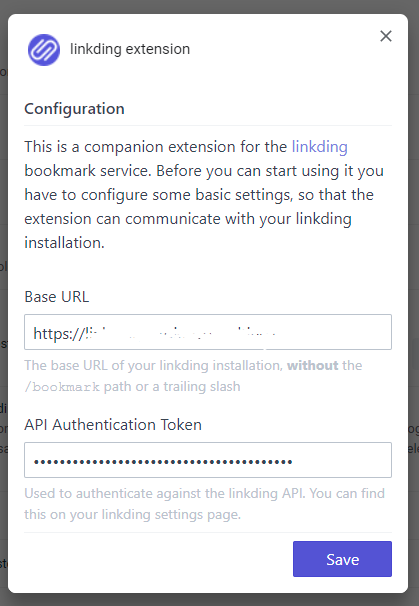
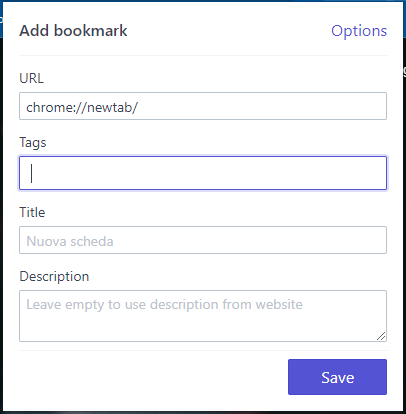
This browser extension makes adding a URL to your bookmarks much easier.
Enjoy!
