If you are exposing ports and services from your network to the internet, using a reverse proxy is a great way to improve performance and security. A reverse proxy is simply a server that sits between your router and one or more web servers and forwards client requests to the relevant web servers. Put simply, you only need to expose one server to the internet (using TCP ports 80 and 443), and you will be able to access all the web services you want on your network.
Below is an example diagram showing the network flow without a reverse proxy.
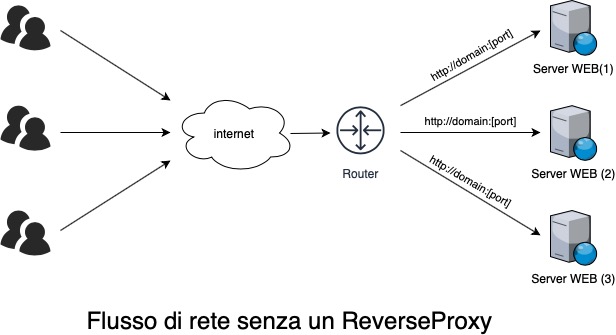
Without a reverse proxy, you need to define unique network ports for each web server.
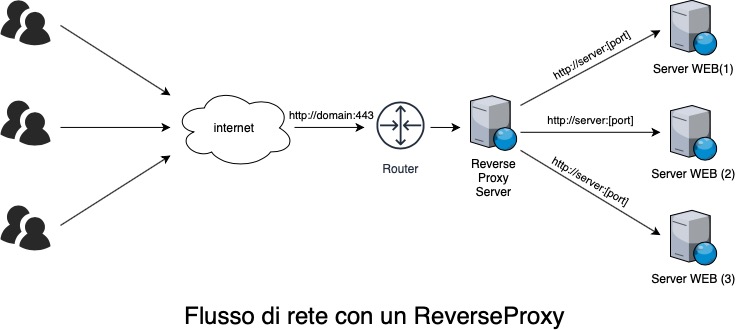
With a reverse proxy, all traffic can be routed through just two TCP ports, 80 and 443.
Make sure you have Docker and Docker Compose installed; if not, you can find a guide I wrote on how to install them here.
With that said, connect to your Raspberry Pi via SSH, create the nginx folder and move into it:
mkdir /home/pi/Docker/nginxcd /home/pi/Docker/nginx
Now create a file called config.json
nano config.json
and enter the following:
{
  "database": {
    "engine": "mysql",
    "host": "db",
    "name": "npm",
    "user": "npm",
    "password": "npm",
    "port": 3306
  }
}
Now close the file by pressing CTRL+X, then type Y (or S, depending on your system language) and finally press ENTER to confirm.
Now create the docker-compose.yml file, also inside the nginx folder
nano docker-compose.ymlversion: '3' services: app: image: 'jc21/nginx-proxy-manager:latest' ports: - '80:80' - '81:81' - '443:443' volumes: - ./config.json:/app/config/production.json - ./data:/data - ./letsencrypt:/etc/letsencrypt db: image: 'yobasystems/alpine-mariadb:latest' environment: MYSQL_ROOT_PASSWORD: 'npm' MYSQL_DATABASE: 'npm' MYSQL_USER: 'npm' MYSQL_PASSWORD: 'npm' volumes: - ./data/mysql:/var/lib/mysql
If you get an error, or the container fails to start and reports its status as “unhealthy“, follow the instructions below:
Replace this line in the docker-compose.yml file:
image: 'yobasystems/alpine-mariadb:latest'
with this:
image: 'yobasystems/alpine-mariadb:10.4.17-arm32v7'
Close the file by pressing CTRL+X, then type Y (or S, depending on your system language) and finally press ENTER to confirm.
sudo docker-compose up -d
Docker will now download and install all the files needed for the container.
Now we will modify both containers used by Nginx Proxy Manager so that they start automatically when your Raspberry Pi reboots.
sudo docker update --restart always nginx_app_1
sudo docker update --restart always nginx_db_1
Now restart the Raspberry Pi (essential!)
sudo reboot now
After the reboot, the full container setup will take a few minutes. To check the container’s status, you can run the following command.
sudo docker ps
As an alternative to the previous command, if you have Portainer installed, you can monitor the status of all your containers from there.
When it reports “healthy“, you will be able to open the Nginx Proxy Manager configuration web page.
http://[RASPBERRY_PI_IP]:81
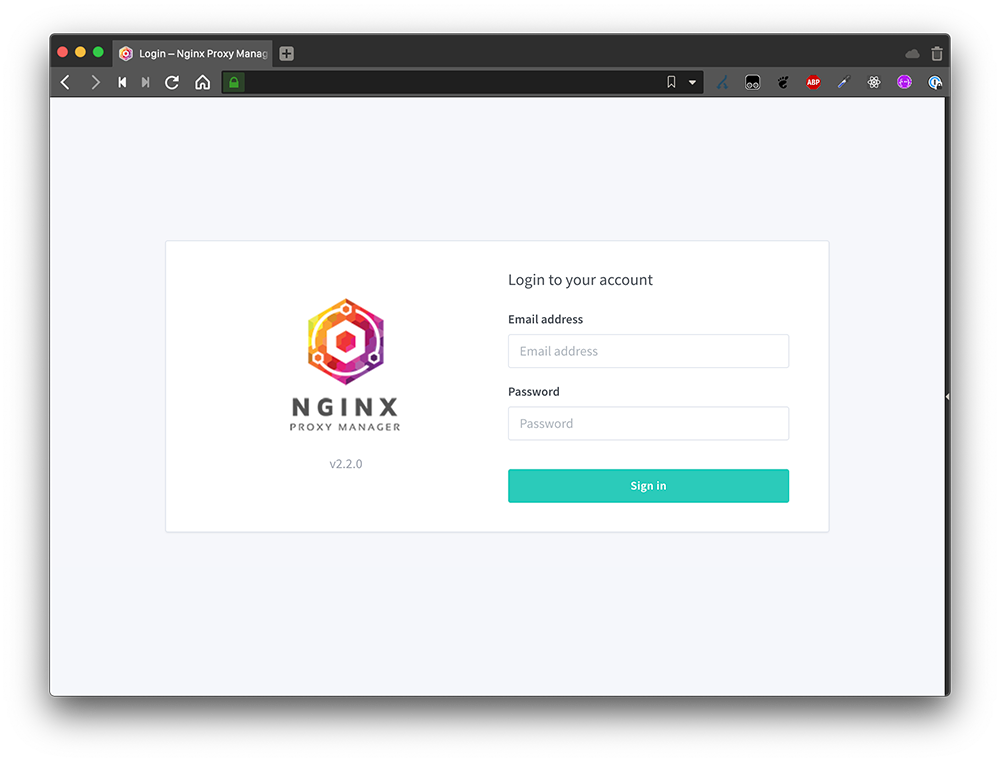
the default login credentials are:
Email: admin@example.com
Password: changeme
When you log in, you will be asked to change these details, after which you will see the following screen:
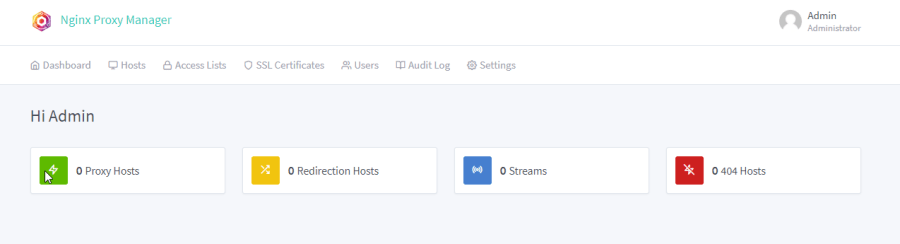
Nginx Proxy Manager is now fully installed. You will need to open TCP ports 80 and 443 on your router and point them to your Raspberry Pi. After that, all that’s left is to configure Nginx Proxy Manager.
Enjoy!
