The essential prerequisites for following this guide through to the end are, of course, a Raspberry Pi (Zero W, 1, 2, 3 or 4) running Raspbian (preferably the Lite version) with the Docker platform installed (installation guide at this link).
With that said, the steps to follow are:
Connect to your Raspberry Pi via SSH and create the following folder:
mkdir /home/pi/docker-homebridgecd /home/pi/docker-homebridge
Now create a new file called docker-compose.yml using the nano editor.
nano docker-compose.yml
and enter the following in it:
version: '2'
services:
  homebridge:
    image: oznu/homebridge:raspberry-pi
    restart: always
    network_mode: host
    volumes:
       - ./config:/docker-homebridge
    environment:
       - PGID=1000
       - PUID=1000
       - HOMEBRIDGE_CONFIG_UI=1
       - HOMEBRIDGE_CONFIG_UI_PORT=8080
       - TZ=Europe/Rome
- The
restart: alwaysline tells Docker to configure the container so that it restarts automatically if the Raspberry Pi reboots or if the container exits or stops unexpectedly. - The
network_mode: hostline tells Docker to share the Raspberry Pi’s network with the container, allowing your iOS device to discover the Homebridge accessory on your network. - The
./Config:/docker-homebridgeline tells Docker to share the local configuration folder with the container. This lets you recreate or update the Docker container without losing your HomeKit settings and Homebridge plugins. - For an explanation of the
PGIDandPUIDenvironment variables, see User & Group Identifiers. HOMEBRIDGE_CONFIG_UIandHOMEBRIDGE_CONFIG_UI_PORTenable the homebridge-config-ui-x plugin. You can remove these two options if you don’t want to use the user interface.
Save and close the file by pressing CTRL+X and ENTER to confirm the changes.
Start the new container by typing:
docker-compose up -d
- It may take some time to download the initial image, which is around 125 MB compressed.
- Docker will download the latest version of the oznu/homebridge Docker image.
- The
-dflag tellsdocker-composeto run the container as a background process.
You will probably want to view the Homebridge log to check that everything is working and to get the iOS pairing code.
To view the Homebridge log, type:
docker-compose logs -f

Your Homebridge config.json file, plugins and all HomeKit data will be stored in the configuration directory we created earlier.
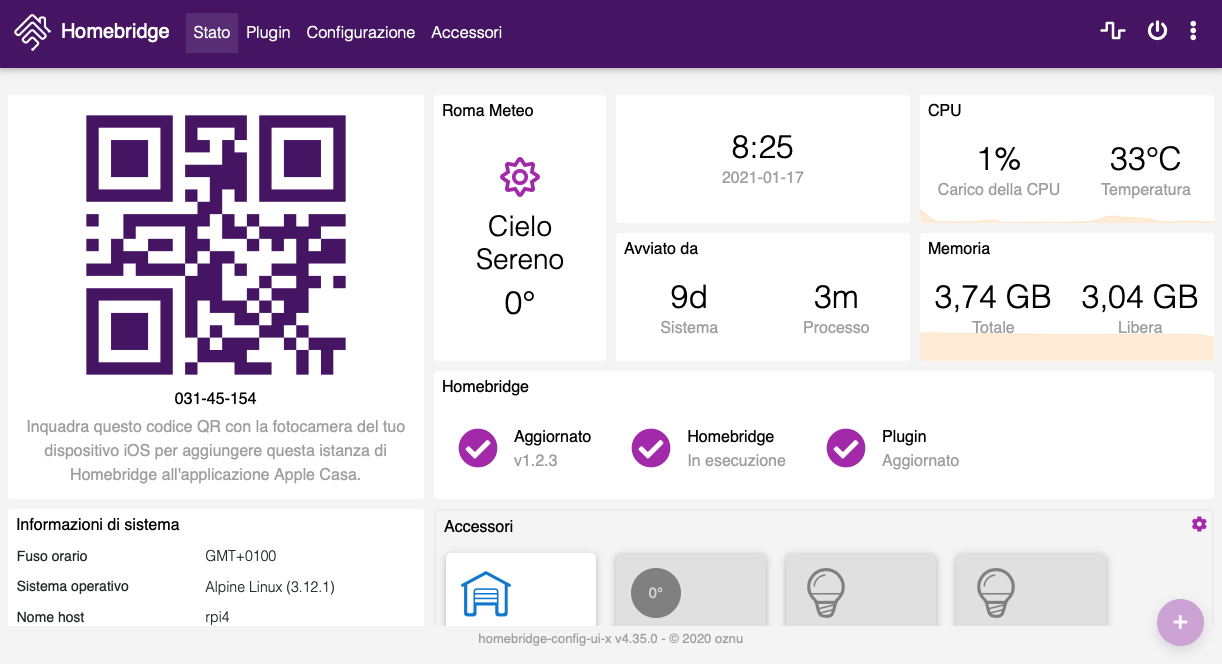
To manage Homebridge, open a web browser and go to http://<your-raspberry-ip>:8080.
For example,
http://192.168.1.20:8080
From here you can install, remove and update plugins, edit Homebridge’s config.json file and restart Homebridge itself.
The default username is admin with the password admin.
Remember that you will need to restart Homebridge to apply any changes you make to the config.json file.

You can restart the Homebridge container from the terminal by running the following command:
docker-compose restart homebridge
You should now be able to find and add the Homebridge accessory in Apple’s Home app on iOS.
You can pair the accessory with your device using the QR code shown in the logs or in the browser via the Homebridge web interface (see above), or by entering the pairing code you have set.
For more information, I recommend taking a look at the following websites:
https://homebridge.io
https://github.com/homebridge/homebridge/wiki
https://github.com/oznu/docker-homebridge
Enjoy!
