In a previous article I described how to install OpenMediaVault on a Raspberry Pi.
Today I will describe how to install the OpenVPN plugin in OpenMediaVault.
To start, go to the OpenMediaVault web page by opening a web browser and entering your Raspberry Pi’s IP address in the address bar.
By default, OpenMediaVault publishes this page on the LAN on TCP port 80 (unless you have also forwarded this port on your router).
So type:
http://IP-DEL-TUP-RPI:80
It is not strictly necessary to type “:80“, because it is the default port for “http://“; I added it simply to show that, if a different port had been configured, this is how you would force the web page to open on that port
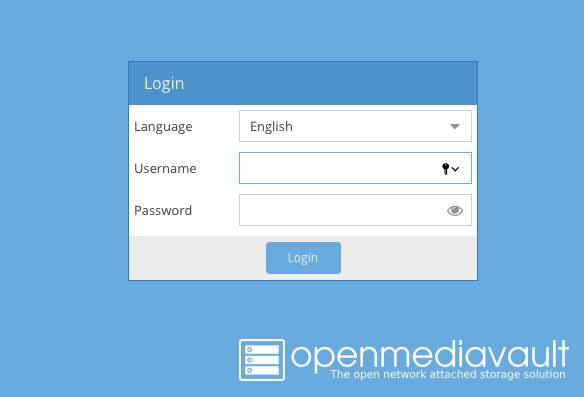
With that said, log in to the OpenMediaVault web interface.
Once authenticated, click Plugins in the side menu (in the System section).
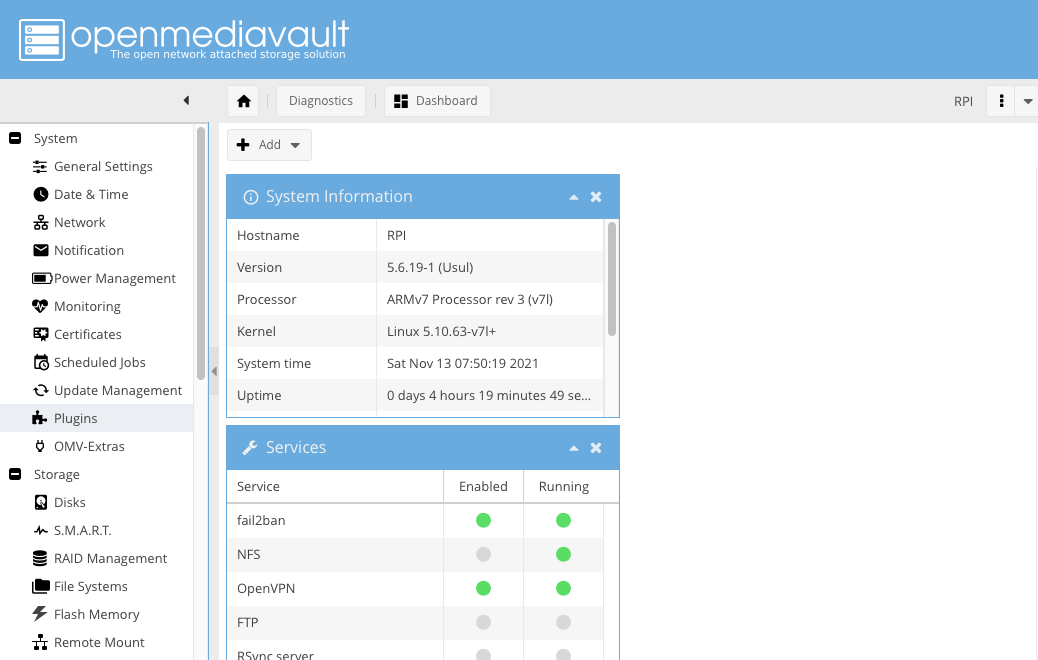
From this menu you can download and install various plugins; in this guide we will install the openmediavault-openvpn plugin which, once configured, will let us run a fully fledged VPN server.
Once the OpenMediaVault Plugins page is open, search for the package by typing vpn in the search field at the top right of the page.
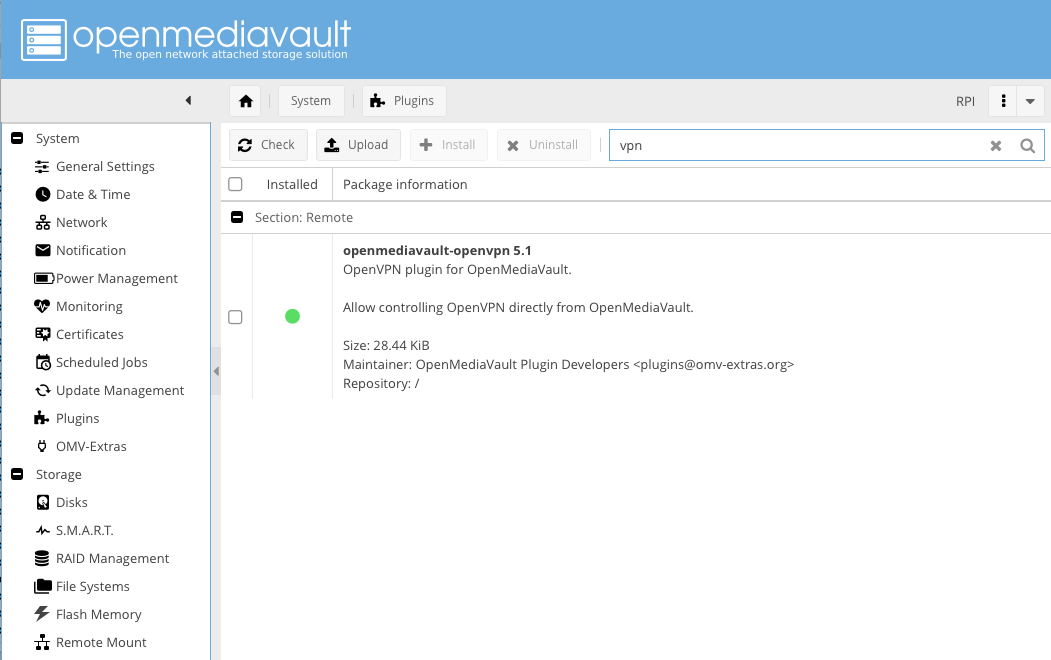
To install the plugin, simply select the package and click the Install button just above it.
Once installation is complete, apply the changes and, if prompted, restart the Raspberry Pi.
Configuring the OpenVPN server
Once the Raspberry Pi has restarted, reopen the OpenMediaVault web page and this time, again from the side menu, click “OpenVPN” in the “Services” section.
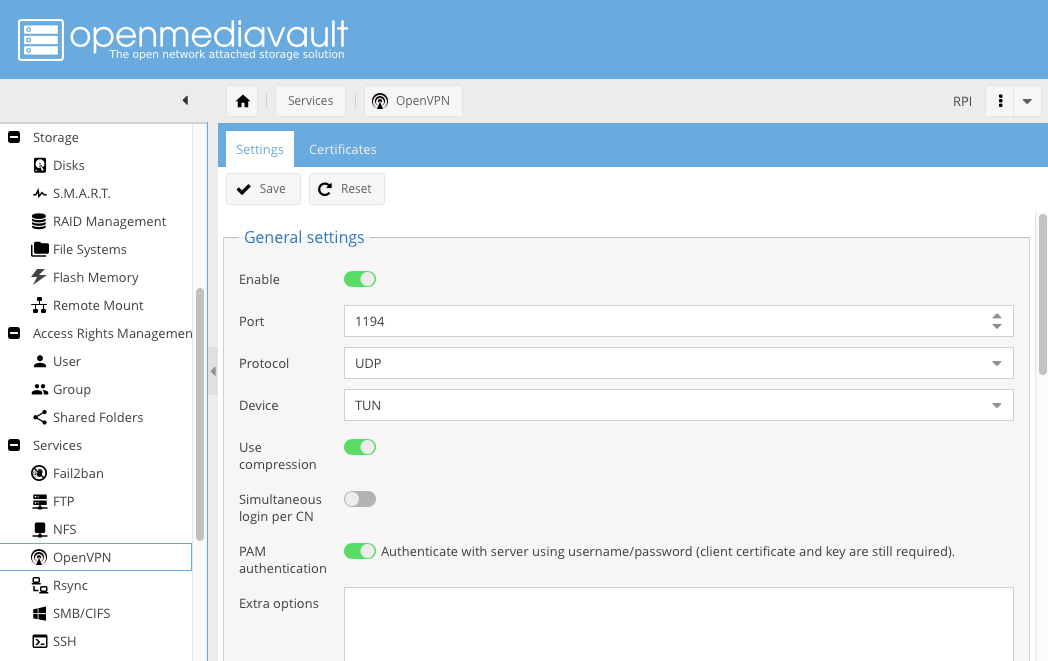
To start, in the “General settings” section, enable the service by turning on the “Enable” switch.
The “Port” field defaults to 1194 (you can choose a different port number if you wish), and the “Protocol” field defaults to UDP (again, you can change it to TCP if you prefer).
In the “Device” field, leave “TUN” selected and optionally enable “Use Compression“
The next setting determines whether or not two or more devices can connect at the same time using the same user (later in this guide I will describe how to add a VPN user).
The next switch enables or disables username and password authentication for VPN connections to this server.
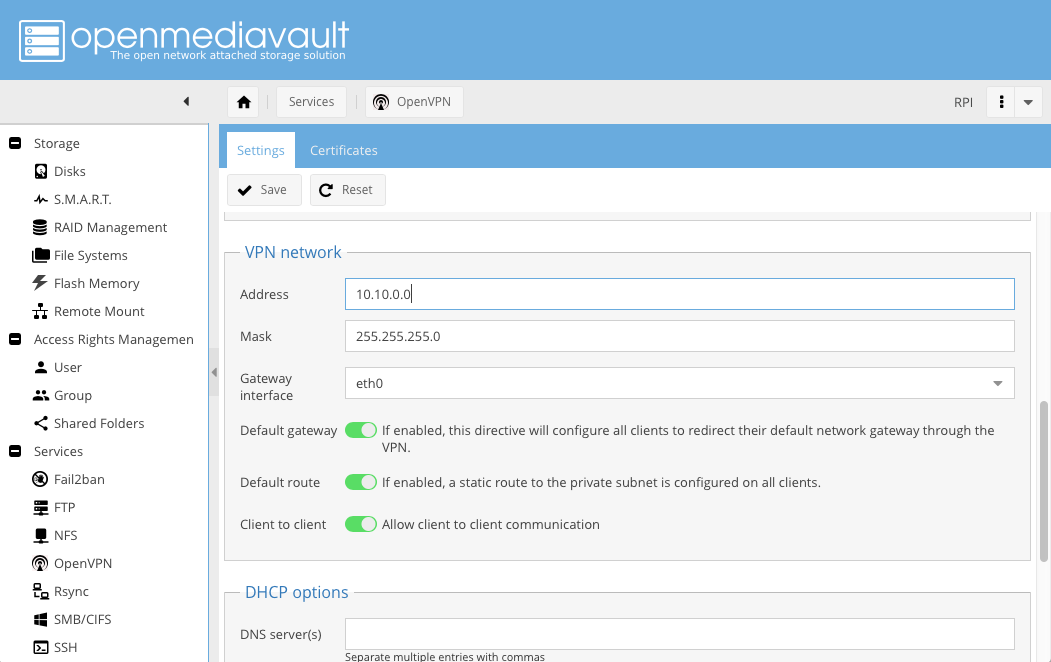
Scrolling down the page, go to the “VPN network” section, where you will find further settings relating to the VPN interface’s network configuration.
A quick clarification here: when we installed the OpenVPN plugin, a virtual network interface was created on which the Raspberry Pi acts as DHCP server and gateway for all clients connecting to the VPN.
So in the Address field, set the subnet you want to use, and in the Mask field define the size of the network (how many IP addresses can be assigned simultaneously)
A 255.255.255.0 subnet (also known as /24) can accommodate 254 devices. If you want to learn more about this topic, I recommend taking a look here.
As the Gateway interface, leave “eth0” selected as long as the Raspberry Pi is connected via LAN cable; otherwise select the wireless network adapter (e.g. wlan0).
Next come the following options:
– Default Gateway: turn this switch on if you want to set the VPN server as the default gateway for connected VPN clients;
– Default Route: again, turn this switch on if you want to set the Raspberry Pi as the default route for the VPN client;
– Client to client: turn this switch on if you want VPN clients to be able to see each other on the network.
Scrolling further down you will find the DHCP Options section, but simply scroll past it to the next section, called Public.
Here you can enter either your static (public) IP address or, if you have a dynamic IP address (which changes whenever your provider decides), your DDNS hostname (in these previous articles I described how to use DDNS with a Raspberry Pi).
Once you have set these parameters, click the “Save” button at the top of the page and then click Apply.
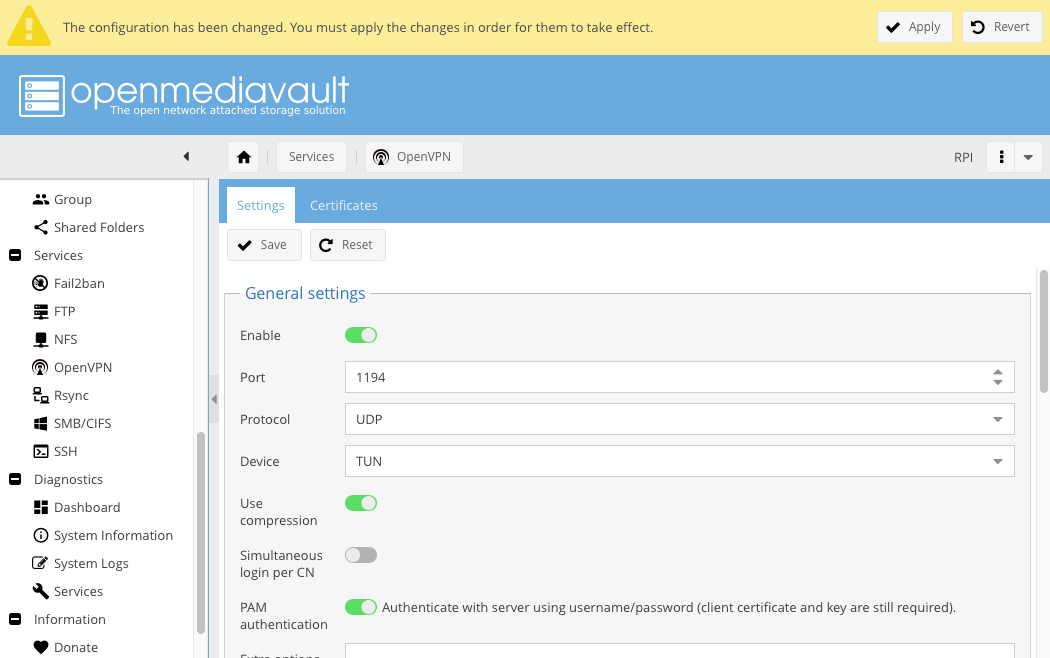
As soon as the web page becomes available again, I recommend restarting the Raspberry Pi.
Creating a user with VPN access
Now we need to create a user (with a password) to authenticate with the Raspberry Pi from our VPN client. To do this, open the OpenMediaVault web page again and, scrolling down the side menu, you will find the “Access Rights Management” section; click “User” within it.
To add an account, click the “+ Add” button and, in the window that follows, enter:
– a Name (required);
– a Comment (optional);
– an email address (optional);
– Password and Confirm Password (required);
– the Shell location (leave unchanged);
– turning on the “Modify Account” switch allows the user being created to edit their own account by accessing the OpenMediaVault web page. If you want to create a user solely for VPN access, I recommend leaving this setting turned off.
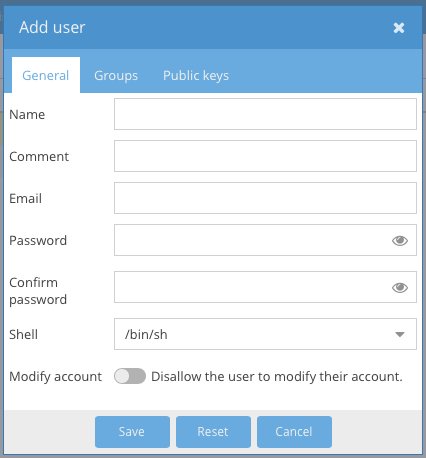
Once you have entered the details, click the “Save” button and then click the “Apply” button that appears at the top right of the window.
Now we need to create the OpenVPN certificate for the user we just created: scroll down the side menu to the “Services” section and click OpenVPN.
Then, at the top of the right-hand pane, click “Certificates“; you can now add the certificate by clicking the “+ Add” button at the top.
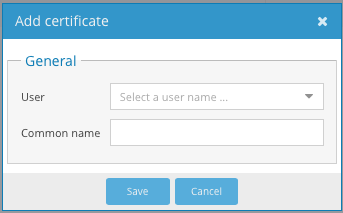
Here, simply select the user you just created from the “User” drop-down menu; optionally, you can enter a common name in the “Common name” field. Finally, save the setting by clicking the “Save” button just below.
Once these settings have been saved, you can download the certificate. It will need to be transferred to the device that will connect to the VPN, so I recommend sending it by email or saving it to a USB drive.
The client connecting to the VPN will need an application to manage the VPN connection. For mobile devices (such as smartphones or tablets), you can download the official OpenVPN app directly from the official stores (Google Play Store for Android, or the App Store for Apple iOS), while to install the VPN client on a PC or Mac, simply go to this page to download the program.
Once you have downloaded and installed the OpenVPN client, simply import into it the certificate you generated and downloaded from the OpenMediaVault web interface.
At this point, although we have installed and configured the OpenVPN server on the Raspberry Pi, created and enabled the VPN user, and installed and configured the VPN client, there is still one final step: forwarding the OpenVPN server’s port and protocol to the outside of our home network.
Near the beginning of this guide, I configured the OpenVPN plugin in OpenMediaVault to use port UDP 1194. We need these two pieces of information to set up port forwarding from outside to the Raspberry Pi’s (internal) IP.
Below is a screenshot of this setting on my modem/router
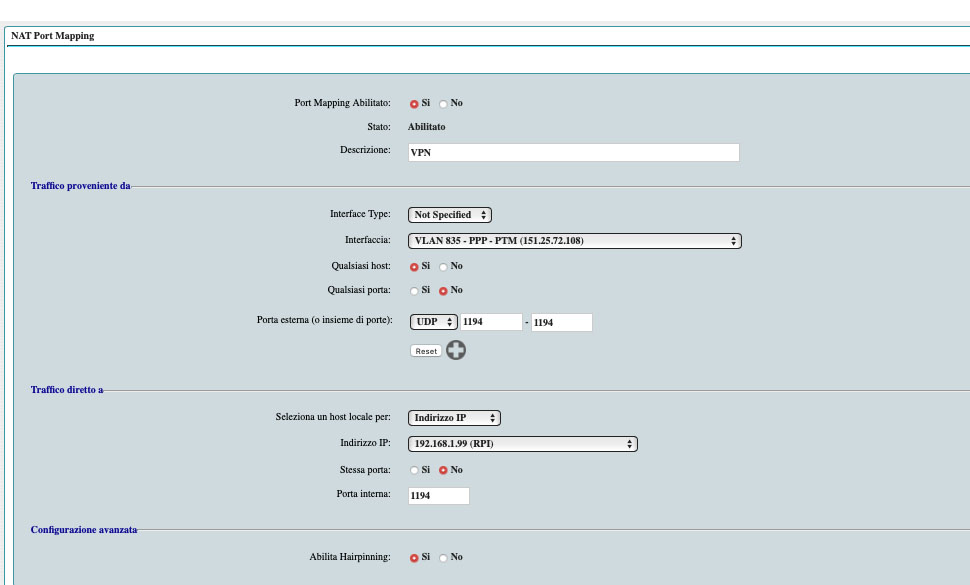
Once this configuration has been completed on your router, you will be able to establish a VPN connection to your Raspberry Pi from outside your network.
Enjoy!
