Requirements for creating a Fusion Drive
1. OS X 10.8.2 Mountain Lion or later
2. An internal traditional hard disk.
3. An internal SSD, usually installed in place of the SuperDrive or as a second drive.
4. An external hard disk with Mountain Lion already installed, and a flash drive (USB stick or SD card) with a bootable copy of the operating system
Backup
This procedure erases all your data, so we recommend making a backup of your hard disk with Time Machine first.
Terminal
To “fuse” your Mac’s traditional hard disk and SSD, connect the external hard disk with Mountain Lion installed and restart the Mac while holding down the Option (Alt) key. When the startup disk selection screen appears, choose the external disk.
Launch Terminal (found in Applications/Utilities) and type the following command:
diskutil list
You will get a screen similar to the one shown below. The Mac’s hard disks are identified as /dev/disk#. Remember (or write down) the numbers of the disks you want to “fuse”. In my case, the two disks to combine are /dev/disk0, which is the SSD, and /dev/disk1, the traditional hard disk.
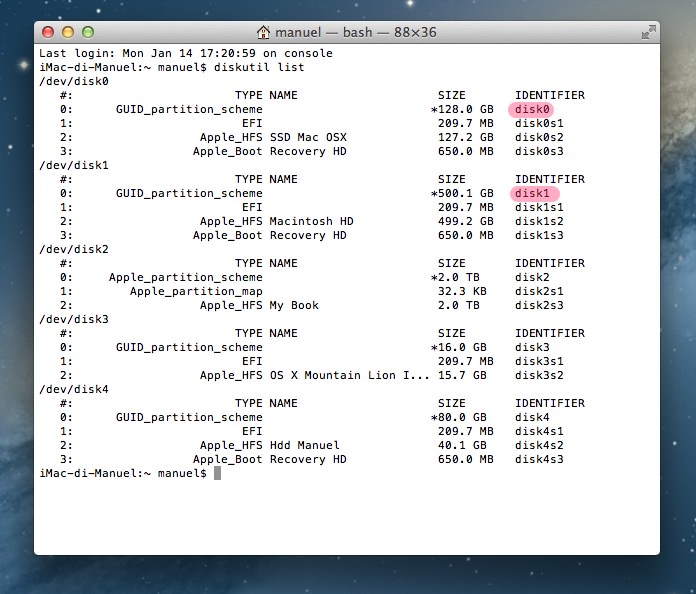
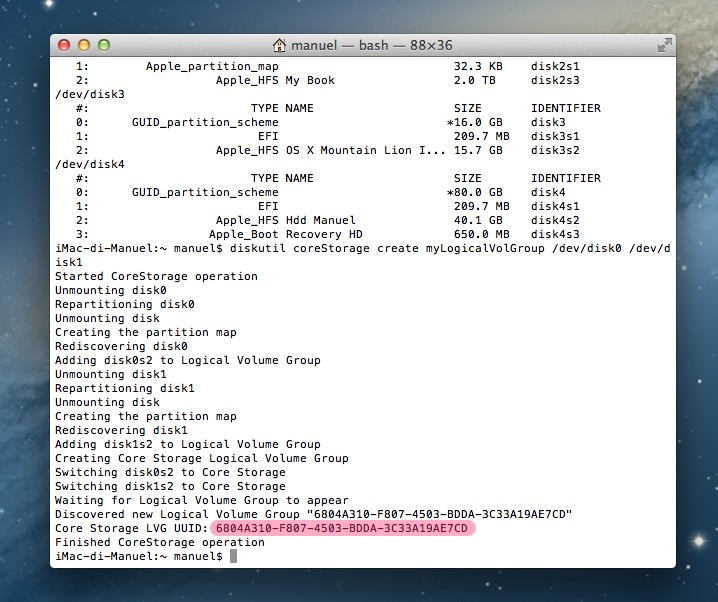
Now type the following command in Terminal, taking care to replace /dev/disk0 and dev/disk1 with the numbers of the disks you want to “fuse” that you noted earlier:
diskutil coreStorage create myLogicalVolGroup /dev/disk0 /dev/disk1
or alternatively
diskutil cs create “Fusion Drive” /dev/disk0 /dev/disk1
After a few moments, you will see a screen like the one shown below. Using the mouse, copy the alphanumeric “Core Storage LVG UUID” highlighted in pink (yours will be different):
Creating the Fusion Drive
The last command to type to create the Fusion Drive is the following (as mentioned, the alphanumeric “Core Storage LVG UUID” shown in blue will be different, and you will need to paste in the one you copied in the previous step):
diskutil coreStorage createVolume 6804A310-F807-4503-BDDA-3C33A19AE7CD jhfs+ “Macintosh HD” 100%
or alternatively
diskutil cs createVolume 6804A310-F807-4503-BDDA-3C33A19AE7CD jhfs+ “Macintosh HD” 100%
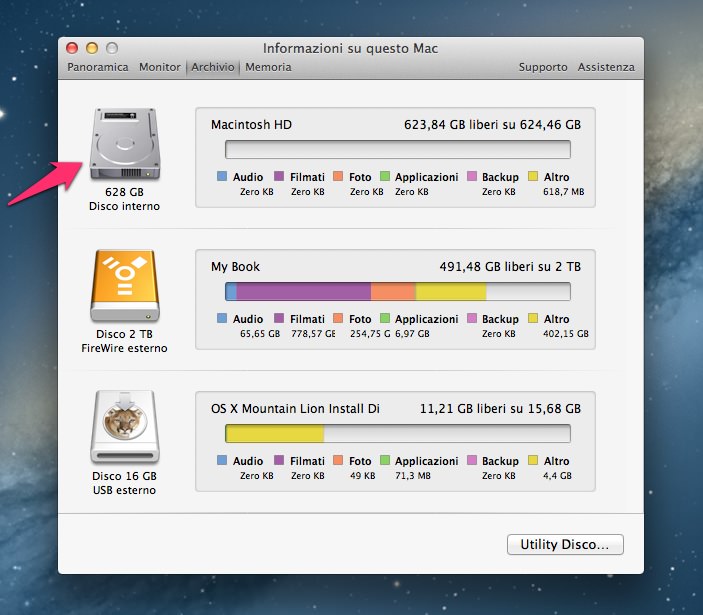
From the Apple menu, select “About This Mac”, click the “More Info” button, then select “Storage”, and check that the fusion operation was successful
In my case, a 624GB volume was created, made up of a 500GB hard disk and a 128GB SSD
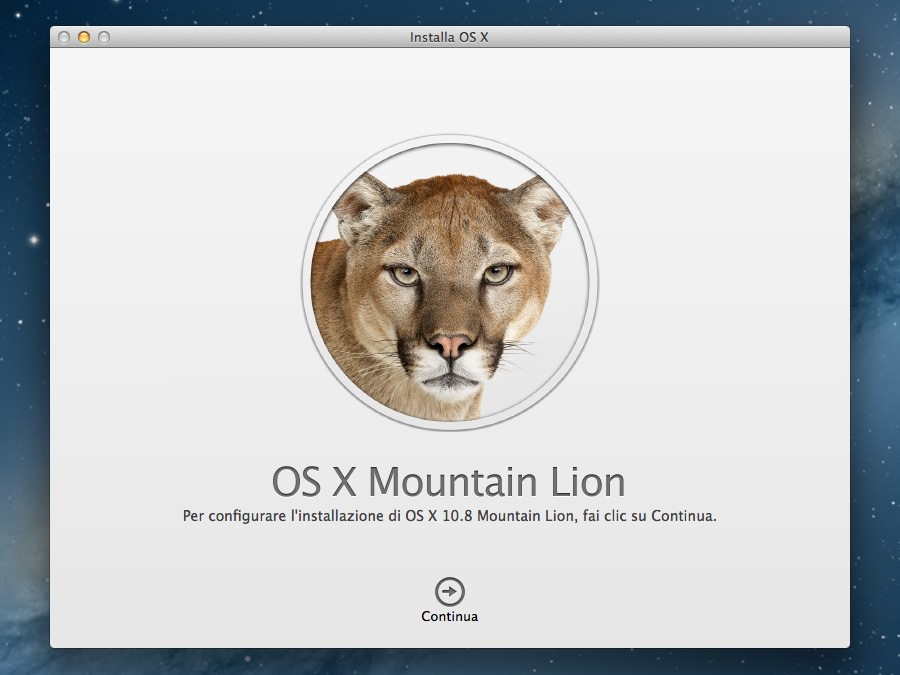
The Fusion Drive creation procedure is now complete. Now that we have a new drive, we need to install Mountain Lion 10.8.2 by launching the “Install Mountain Lion” application from the external flash drive. During installation, select “Show All Disks” and choose the Fusion Drive, named Macintosh HD.
When the installation is complete, you will be asked whether you want to import data from your Time Machine backup disk: connect it and follow the on-screen instructions.
If you have bought a 2012 iMac or Mac mini and do not want to open it up and void the warranty, note that you can also enable Fusion Drive using an external USB 3.0 disk.
Checking Fusion Drive status and viewing the UUID
Checking the Fusion Drive is very simple: just type the following command in Terminal
diskutil cs list
or alternativelydiskutil coreStorage list
If your Mac has a Fusion Drive, you will see a screen similar to the one shown below. The Mac’s hard disks (Physical Volumes) are identified as disk#s2, while the UUID needed to delete / split the Fusion Drive is the one shown next to Logical Volume Group
Disabling the Fusion Drive
To disable the Fusion Drive, open Terminal and type:
diskutil coreStorage delete lvgUUIDor alternativelydiskutil cs delete lvgUUID
replace lvgUUID with your own Logical Volume Group
When you split the Fusion Drive, both disks are formatted as JHFS+; in addition, when the “CoreStorage Logical Volume Group” is destroyed, the recovery partition is also erased.
Enjoy!
