Apache Guacamole is a clientless remote desktop gateway. It supports standard protocols such as VNC, RDP and SSH.
It is called “clientless” because it does not require any plugins or client software to be installed.
Thanks to HTML5, once Guacamole is installed on a server, all you need to access your desktops is a web browser.
You can install Apache Guacamole either natively (directly on a Linux machine) or as a Docker container. In this article we will install it in Docker on a Raspberry Pi.
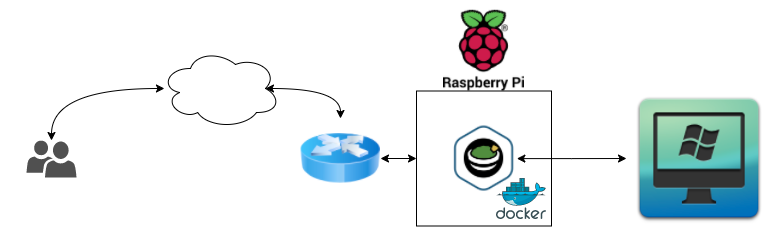
With this tool, you only need to expose (forward) port 80 to the Raspberry Pi (if you use a proxy such as NGINX Proxy Manager, you can also expose port 443), and you will then be able to access your PCs on your network completely securely (once configured).
To install this container, you need a Raspberry Pi with Docker and docker-compose installed (here is a guide to installing Docker on a Raspberry Pi).
With that said, create a folder that will contain the docker-compose.yml file needed to create and configure the container.
mkdir guacamolecd guacamolesudo nano docker-compose.yml
and enter the following:
version: '2'
services:
  guacamole:
  image: oznu/guacamole:armhf
  container_name: guacamole
  restart: always
  ports:
    - 8080:8080
  volumes:
    - ./config:/config
With these parameters, the container will be published on TCP port 8080. If you would rather use a different port to reach the Guacamole web page, for example port 8888, the parameter to enter is:
...
ports:
  - 8888:8080
...
Once you have pasted the text and adapted it to your needs, close the file by pressing CTRL+X, then type Y (or S, depending on your system language) and finally press ENTER to confirm.
Once that’s done, all that’s left is to bring up the container with the following command:
docker-compose up -d
wait a few seconds, then open your preferred web browser and type the following in the address bar:
http://[IP-DEL-TUO-RASPBERRY]:8080
and you will be greeted by the following screen.
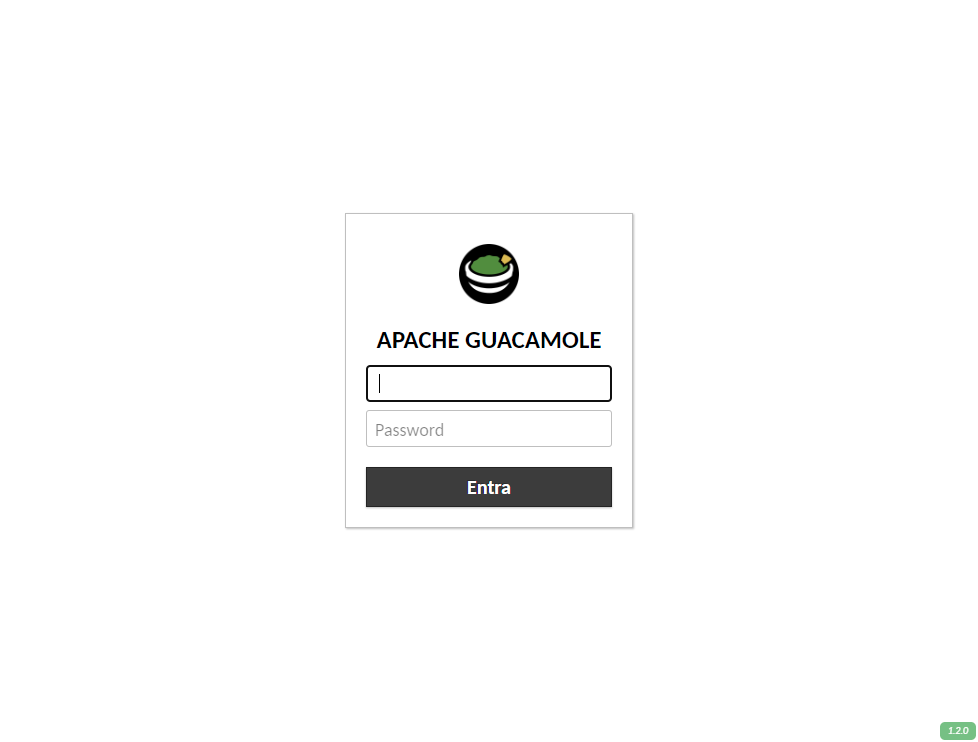
the default login credentials are:
Username: guacadmin
Password: guacadmin
Once logged in, you will see the following screen:
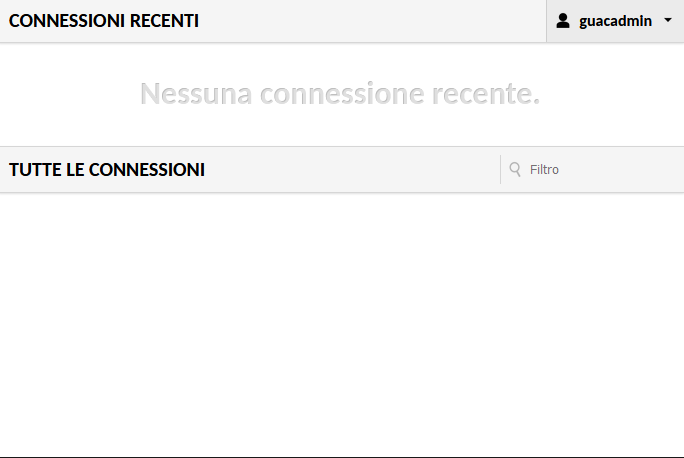
I recommend changing the default password for the guacadmin user. To do so, simply click guacadmin at the top right and select “Settings” from the drop-down menu that appears.
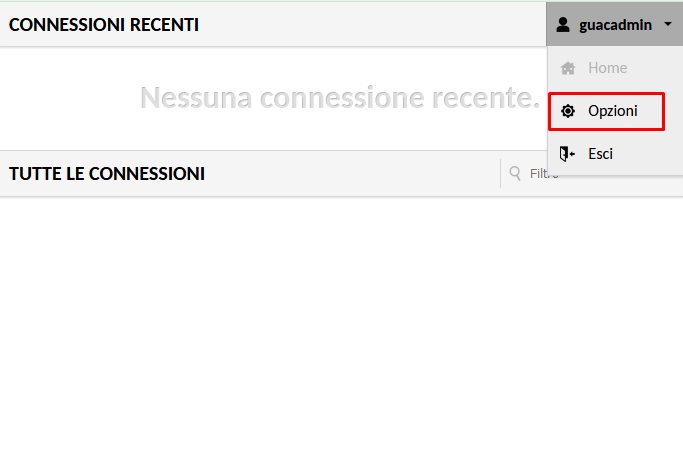
Next, click “Preferences” (in the top menu). Then, in the “CHANGE PASSWORD” section, enter your current password and, in the fields below, the new password. Once that’s done, simply click the “Update Password” button.
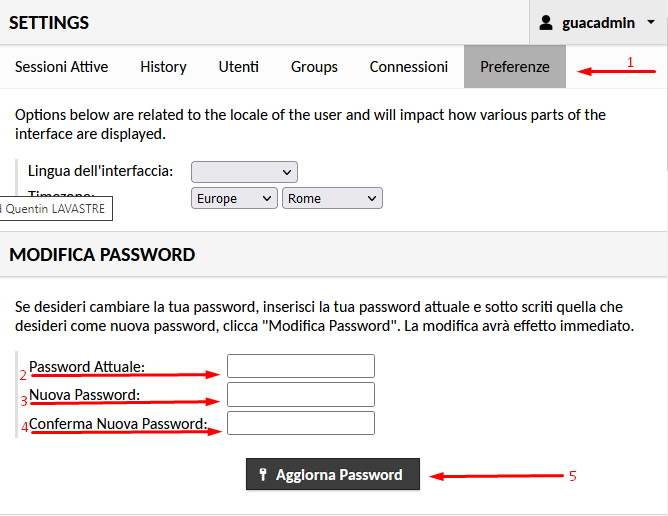
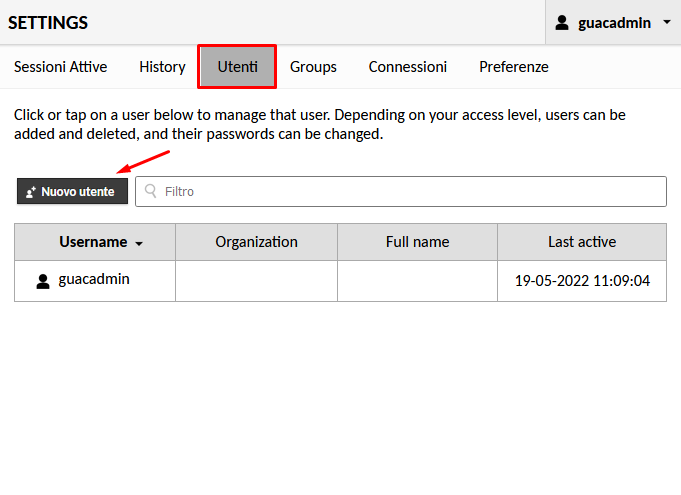
If you want to delete the “guacadmin” account instead, I recommend first creating a new (admin) user. To do this, click guacadmin at the top right and select “Settings” from the drop-down menu that appears.
On the next screen, click “Users” and, to add a new user, click the “New User” button.
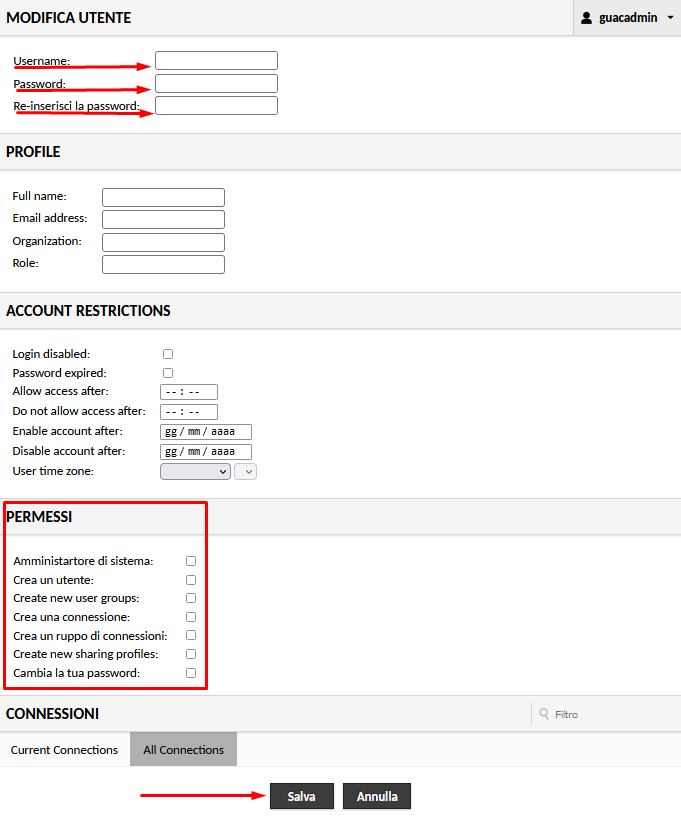
Then simply enter the requested details, such as username and password and — crucially, to give this new account administrative rights — tick all the boxes in the “PERMISSIONS” section. Immediately afterwards, click the “Save” button at the bottom of the page.
Once this step is complete, all that’s left is to disable the “guacadmin” account. To do this, log out as guacadmin and log in with the account you just created, go to “Settings“, click “USERS“, select the “guacadmin” account and, on the screen that appears, tick “Login disabled” in the “ACCOUNT RESTRICTIONS” section. Then simply click the “Save” button at the bottom of the page and you’re done.
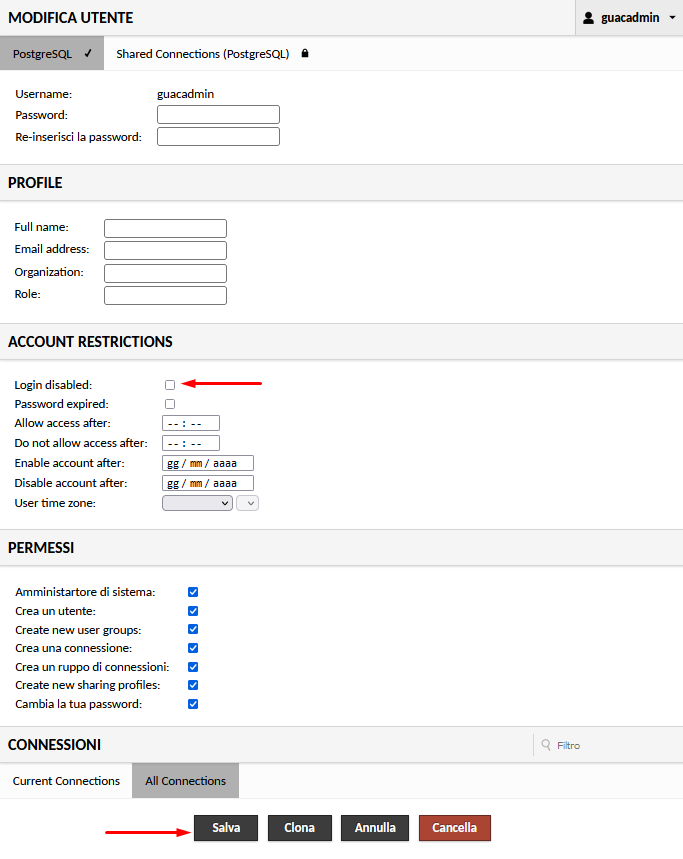
If you want to delete the “guacadmin” account altogether, simply click the “Delete” button and the account will be removed.
Once these security settings are complete, let’s create and configure an RDP connection.
From the main Guacamole screen (after logging in), click your user account name at the top right of the screen and once again click Settings.
Then click “Connections” and then the “New Connection” button.
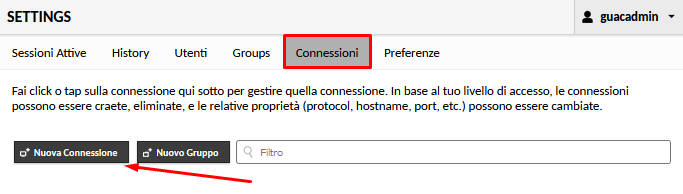
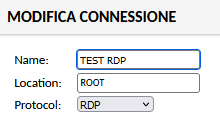
Next, you need to enter some information: in the first section, enter the name you want to give the connection
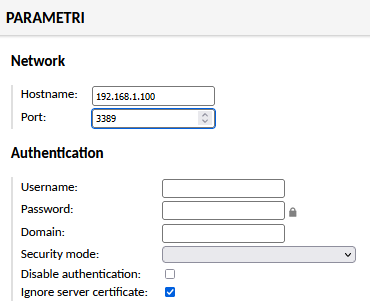
then move to the “PARAMETERS” section and enter the IP address of the machine you want to connect to (on the machine you want to connect to, I recommend setting a static IP address so that it does not change over time, and above all making sure a password is set on the Windows machine and that RDP connections are enabled). In the “Port” field, enter 3389 (the default port for RDP).
Optionally, you can store the login credentials in the fields below; I also recommend ticking “Ignore server certificate“.
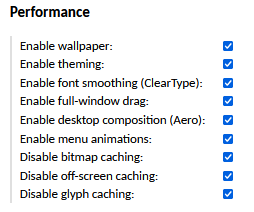
Another section I recommend checking, and possibly enabling in full, is the “Performance” section.
Then simply click the “Save” button at the bottom of the page.
Now, to test the connection you just created, click your user account name at the top right and select “Home“; you will see the new connection at the bottom of the page.
Enjoy!
