In this article we will configure a thermostat in HAP-NodeJS. Personally, this is the accessory for which I prefer HAP-NodeJS over the many other existing tools (such as Homebridge or Node-RED), which in some cases are more convenient and practical but would not allow this accessory to be built the way I did it.
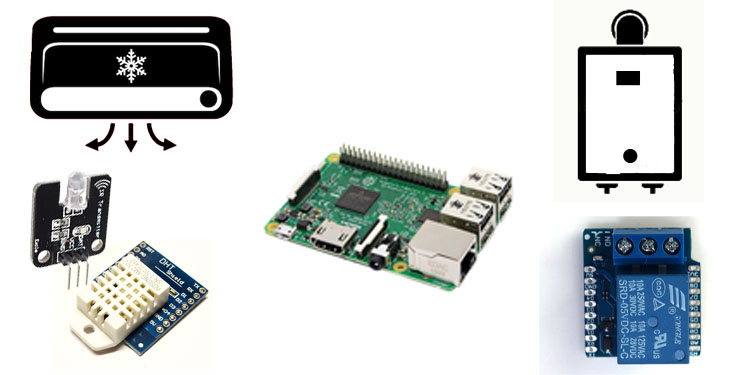
Below I will explain how to build the accessory physically, using two Wemos D1 mini boards, a relay shield, a DHT12 shield and an IR LED (wavelength: 850 nm, 38 kHz).
Here too, I used the MQTT protocol (Mosquitto) to make the Raspberry Pi and the Wemos D1 mini boards communicate with each other.
As a prerequisite, you should of course have a Raspberry Pi with Mosquitto and HAP-NodeJS correctly installed.
Below are the links to the two guides:
Apple HomeKit on Raspberry Pi
MQTT Broker (Mosquitto) on Raspberry Pi
You must also have installed the npm packages for the MQTT module; if you haven’t, the commands are as follows:
cd /home/pi/HAP-NodeJSsudo npm install mqtt --save
sudo npm install mqtt -g
To start, connect to your Raspberry Pi via SSH and run the following commands to download and install the accessory.
cd /home/pi/HAP-NodeJS/src/accessories
wget https://fargionconsulting.com/wp-content/uploads/2020/02/Termostato_accessory.ts
Now, if you have set up HAP-NodeJS to start automatically, restart the Raspberry Pi so that HAP-NodeJS detects the new accessory.
Also, if you have chosen to use BridgedCore.ts, the accessory will automatically appear alongside the accessory you created and paired previously; if you are using Core.ts, you will need to add the new accessory from your Apple device. For this switch too, pairing is done with the code 031-45-154.
Now let’s move on to the hardware. As mentioned, this HomeKit accessory requires two Wemos D1 mini boards: one will be placed near the boiler (or near your existing thermostat), and the second (with the temperature sensor and infrared LED) in the room where the air conditioner is located (ideally facing it).
To build and assemble these devices more quickly, I recommend using the relay shield and the DHT12 sensor shield.
So you will need:
- 2 Wemos D1 mini
- 1 Relay shield
- 1 DHT12 shield
- 1 IR LED (transmitter)
- 1 x 220 Ω 1/4 W resistor
- 1 IR receiver (VS1838B) for cloning the signals of your existing air conditioner remote control
Before moving on to the Arduino code, a word of introduction:
The signals sent by air conditioner remote controls are more complex than those of traditional remotes: every time a button is pressed, they transmit a series of commands separated by predefined pauses.
To read these signals I used a paid program called AnalysIR (available here; it can be obtained at a reduced price with a Maker licence), an Arduino UNO board and an IR receiver.
With this application (Windows only), I was able to capture the commands from the air conditioner remote control correctly (function by function) and then insert them into the Arduino code dedicated to controlling the air conditioner.
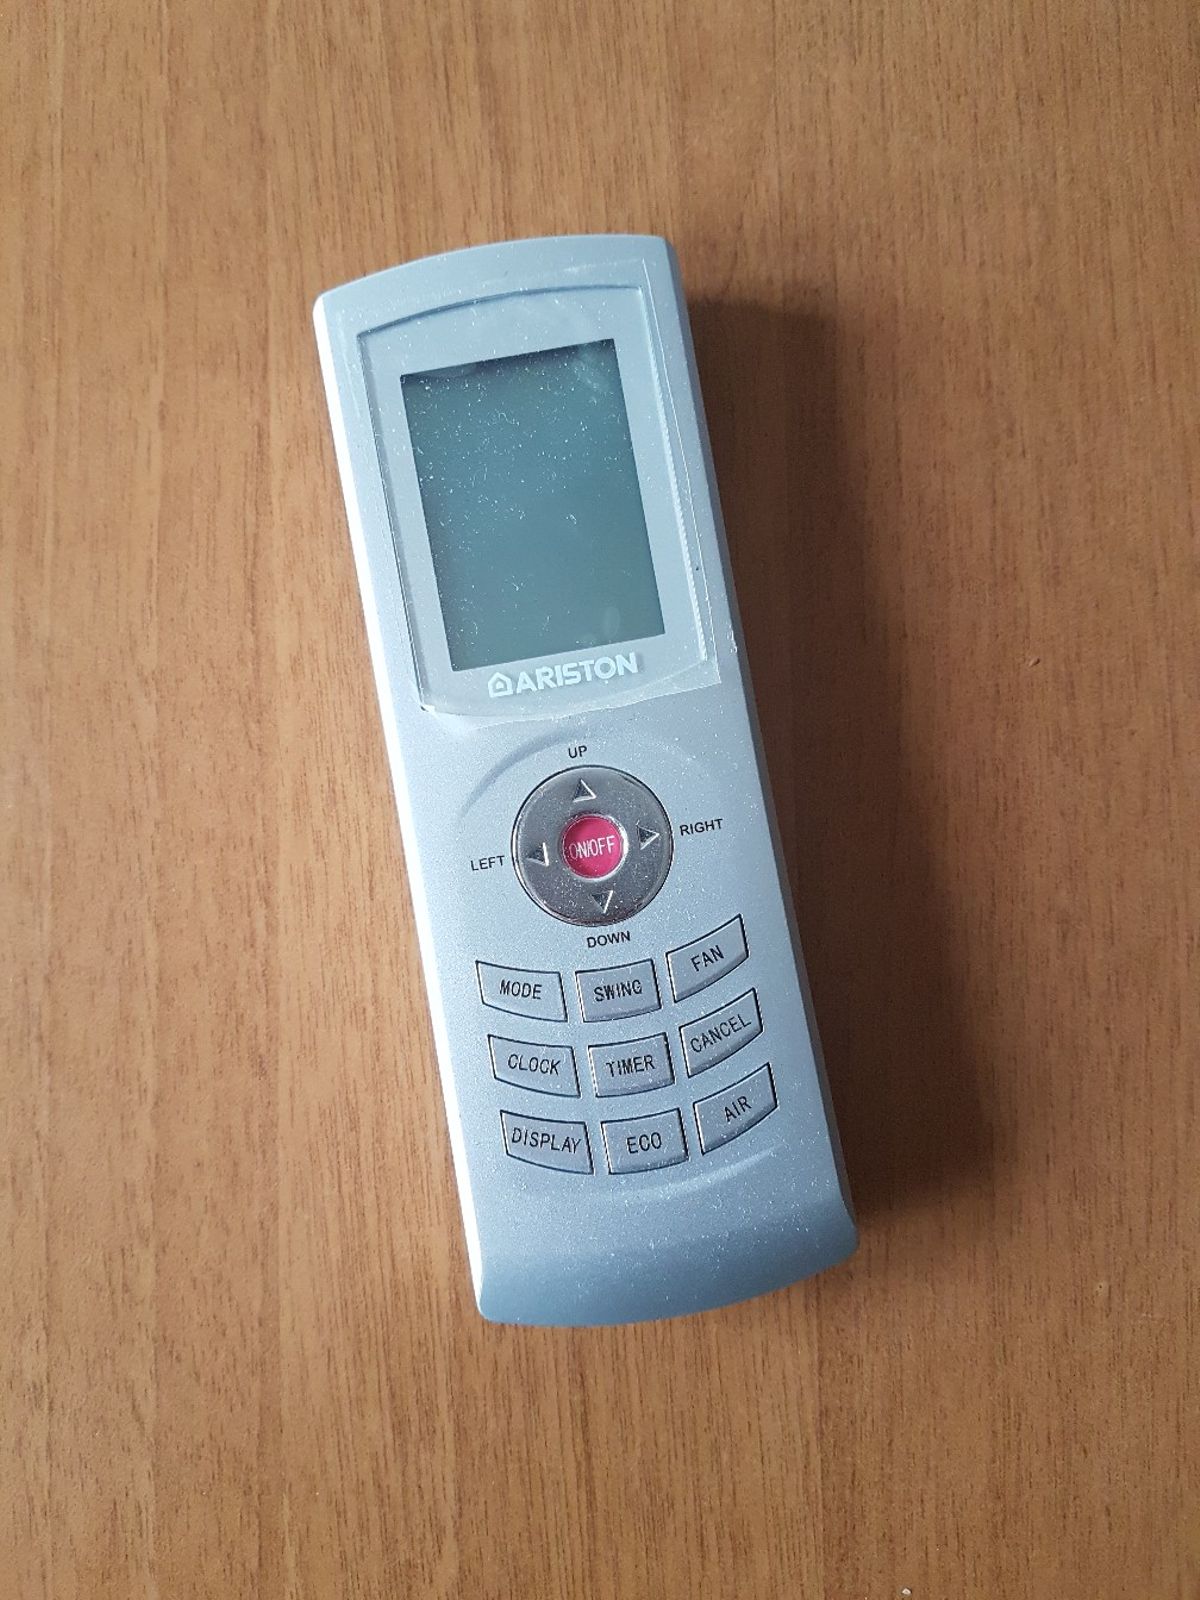
In my case, I recorded the commands from this remote control
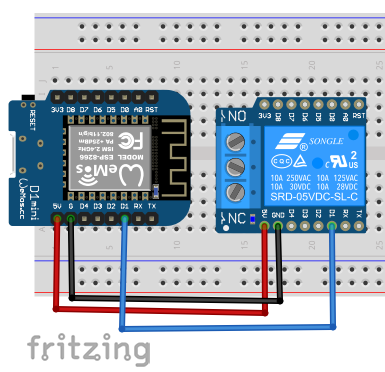
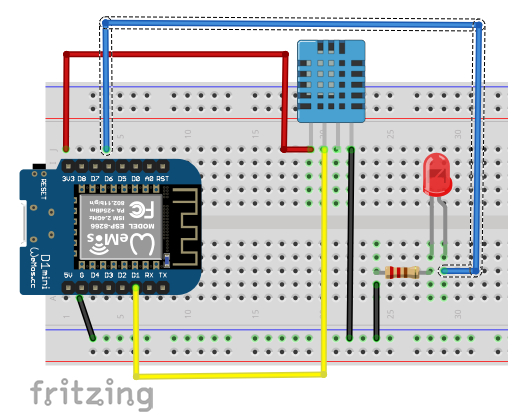
Wiring diagram
Now let’s move on to the Arduino code for our Wemos D1 mini boards:
Temperature and humidity sensor with IR, available here
Boiler actuator, available here
Here too, before uploading the Arduino code to your boards, you need to change some parameters, such as the name and password of your Wi-Fi network, and enter your Raspberry Pi’s IP address

Enjoy!
