I often need to back up the memory card used in my Raspberry Pi (I make these backups every time I need to make major changes to my microcomputer, to avoid any unpleasant surprises)
Creating the disk image
To create a disk image of an SD (or microSD) card, I connect it to my Mac via a memory card reader and follow these steps:
I launch Terminal and use the following command to get a list of the disks on my Mac
diskutil list
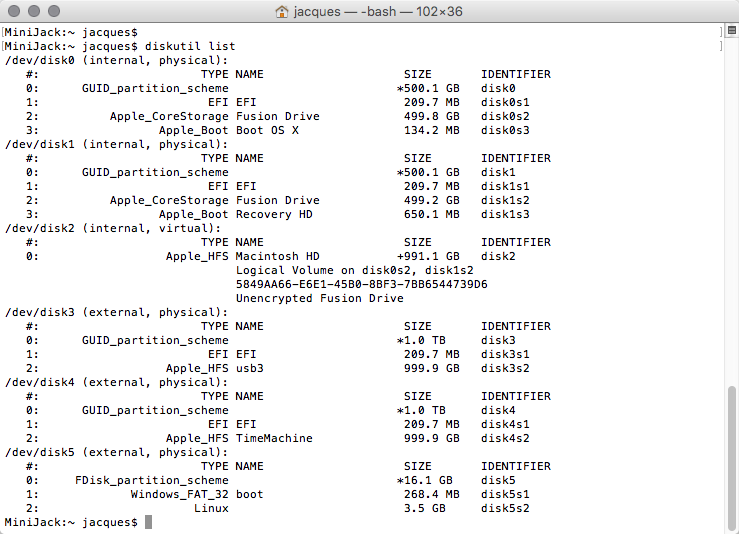
Identify the path of your memory card.
In my case, the path is: /dev/disk5
To start creating the disk image, the command is:
sudo dd if=/dev/disk5 of=~/Desktop/raspberrypi.dmg
This will create the disk image file on your Desktop with the name raspberrypi.dmg
Restoring the disk image
To restore the disk image to a memory card (or external disk), the procedure is as follows:
Identify your external disk (SD card) from the terminal with the following command:
diskutil list
Again, my SD card is identified as /dev/disk5
Now, to restore the image, run the following commands:
sudo diskutil unmountDisk /dev/disk5sudo dd bs=10m if=/Users/jacques/Desktop/raspberrypi.dmg of=/dev/disk5
These commands unmount the /dev/disk5 disk (to make it available for cloning) and then run the restore command, reading the raspberrypi.dmg image from the Desktop and restoring it to the memory card.
Monitoring the progress of a disk image restore or creation
Unfortunately, there is no way to view the progress of creating or restoring the disk image from the terminal, but if you wish you can monitor read/write activity on the disks connected to your Mac by opening a new terminal window and running the following command:
sudo iostat -n 8 -d 1
Enjoy!
