Let’s say you have installed MySQL on your Raspberry Pi, but you are used to managing databases through a graphical interface rather than from the terminal…
The go-to graphical interface for managing MySQL databases is phpMyAdmin.
Below, we will walk through how to install this tool for easier management of our Raspberry Pi-hosted database.
Open the terminal or establish an SSH connection, and start by logging in to the terminal as root:sudo su
enter the password and press Enter.
Now download the required package:apt-get install phpmyadmin
during installation you will be asked which web server phpMyAdmin should be installed on:
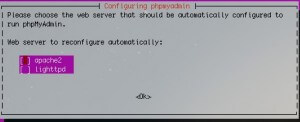
use the arrow keys to select:
| apache2 |
and press Enter to confirm
You will be asked for the root password of your MySQL database.
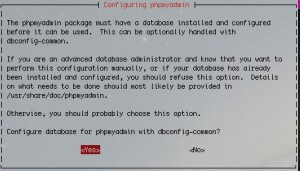
Shortly afterwards, this dialog box will open: (again using the arrow keys) select YES and press Enter.
Now let’s configure Apache:
open the configuration file withnano /etc/apache2/apache2.conf
move to the end of the file (using the down arrow) and add the following line:
| Include /etc/phpmyadmin/apache.conf |
Close with Ctrl+X, press Y to save and confirm with Enter
Now restart apache2 with:/etc/init.d/apache2 restart
wait a few seconds and check that everything has worked
open a browser on any computer (as long as it is connected to the same LAN) and type the following in the address bar at the top:
| myraspberryip/phpmyadmin |
of course, replace myraspberryip with your Raspberry Pi’s IP address
to find your Raspberry Pi’s IP address, type ifconfig in the terminal
if this page opens after you press Enter, you can celebrate!

all that’s left is to log in with the password you entered earlier and start experimenting with creating databases, tables and values.
Enjoy!
